Waiter Guide
Place a table order
Before you begin
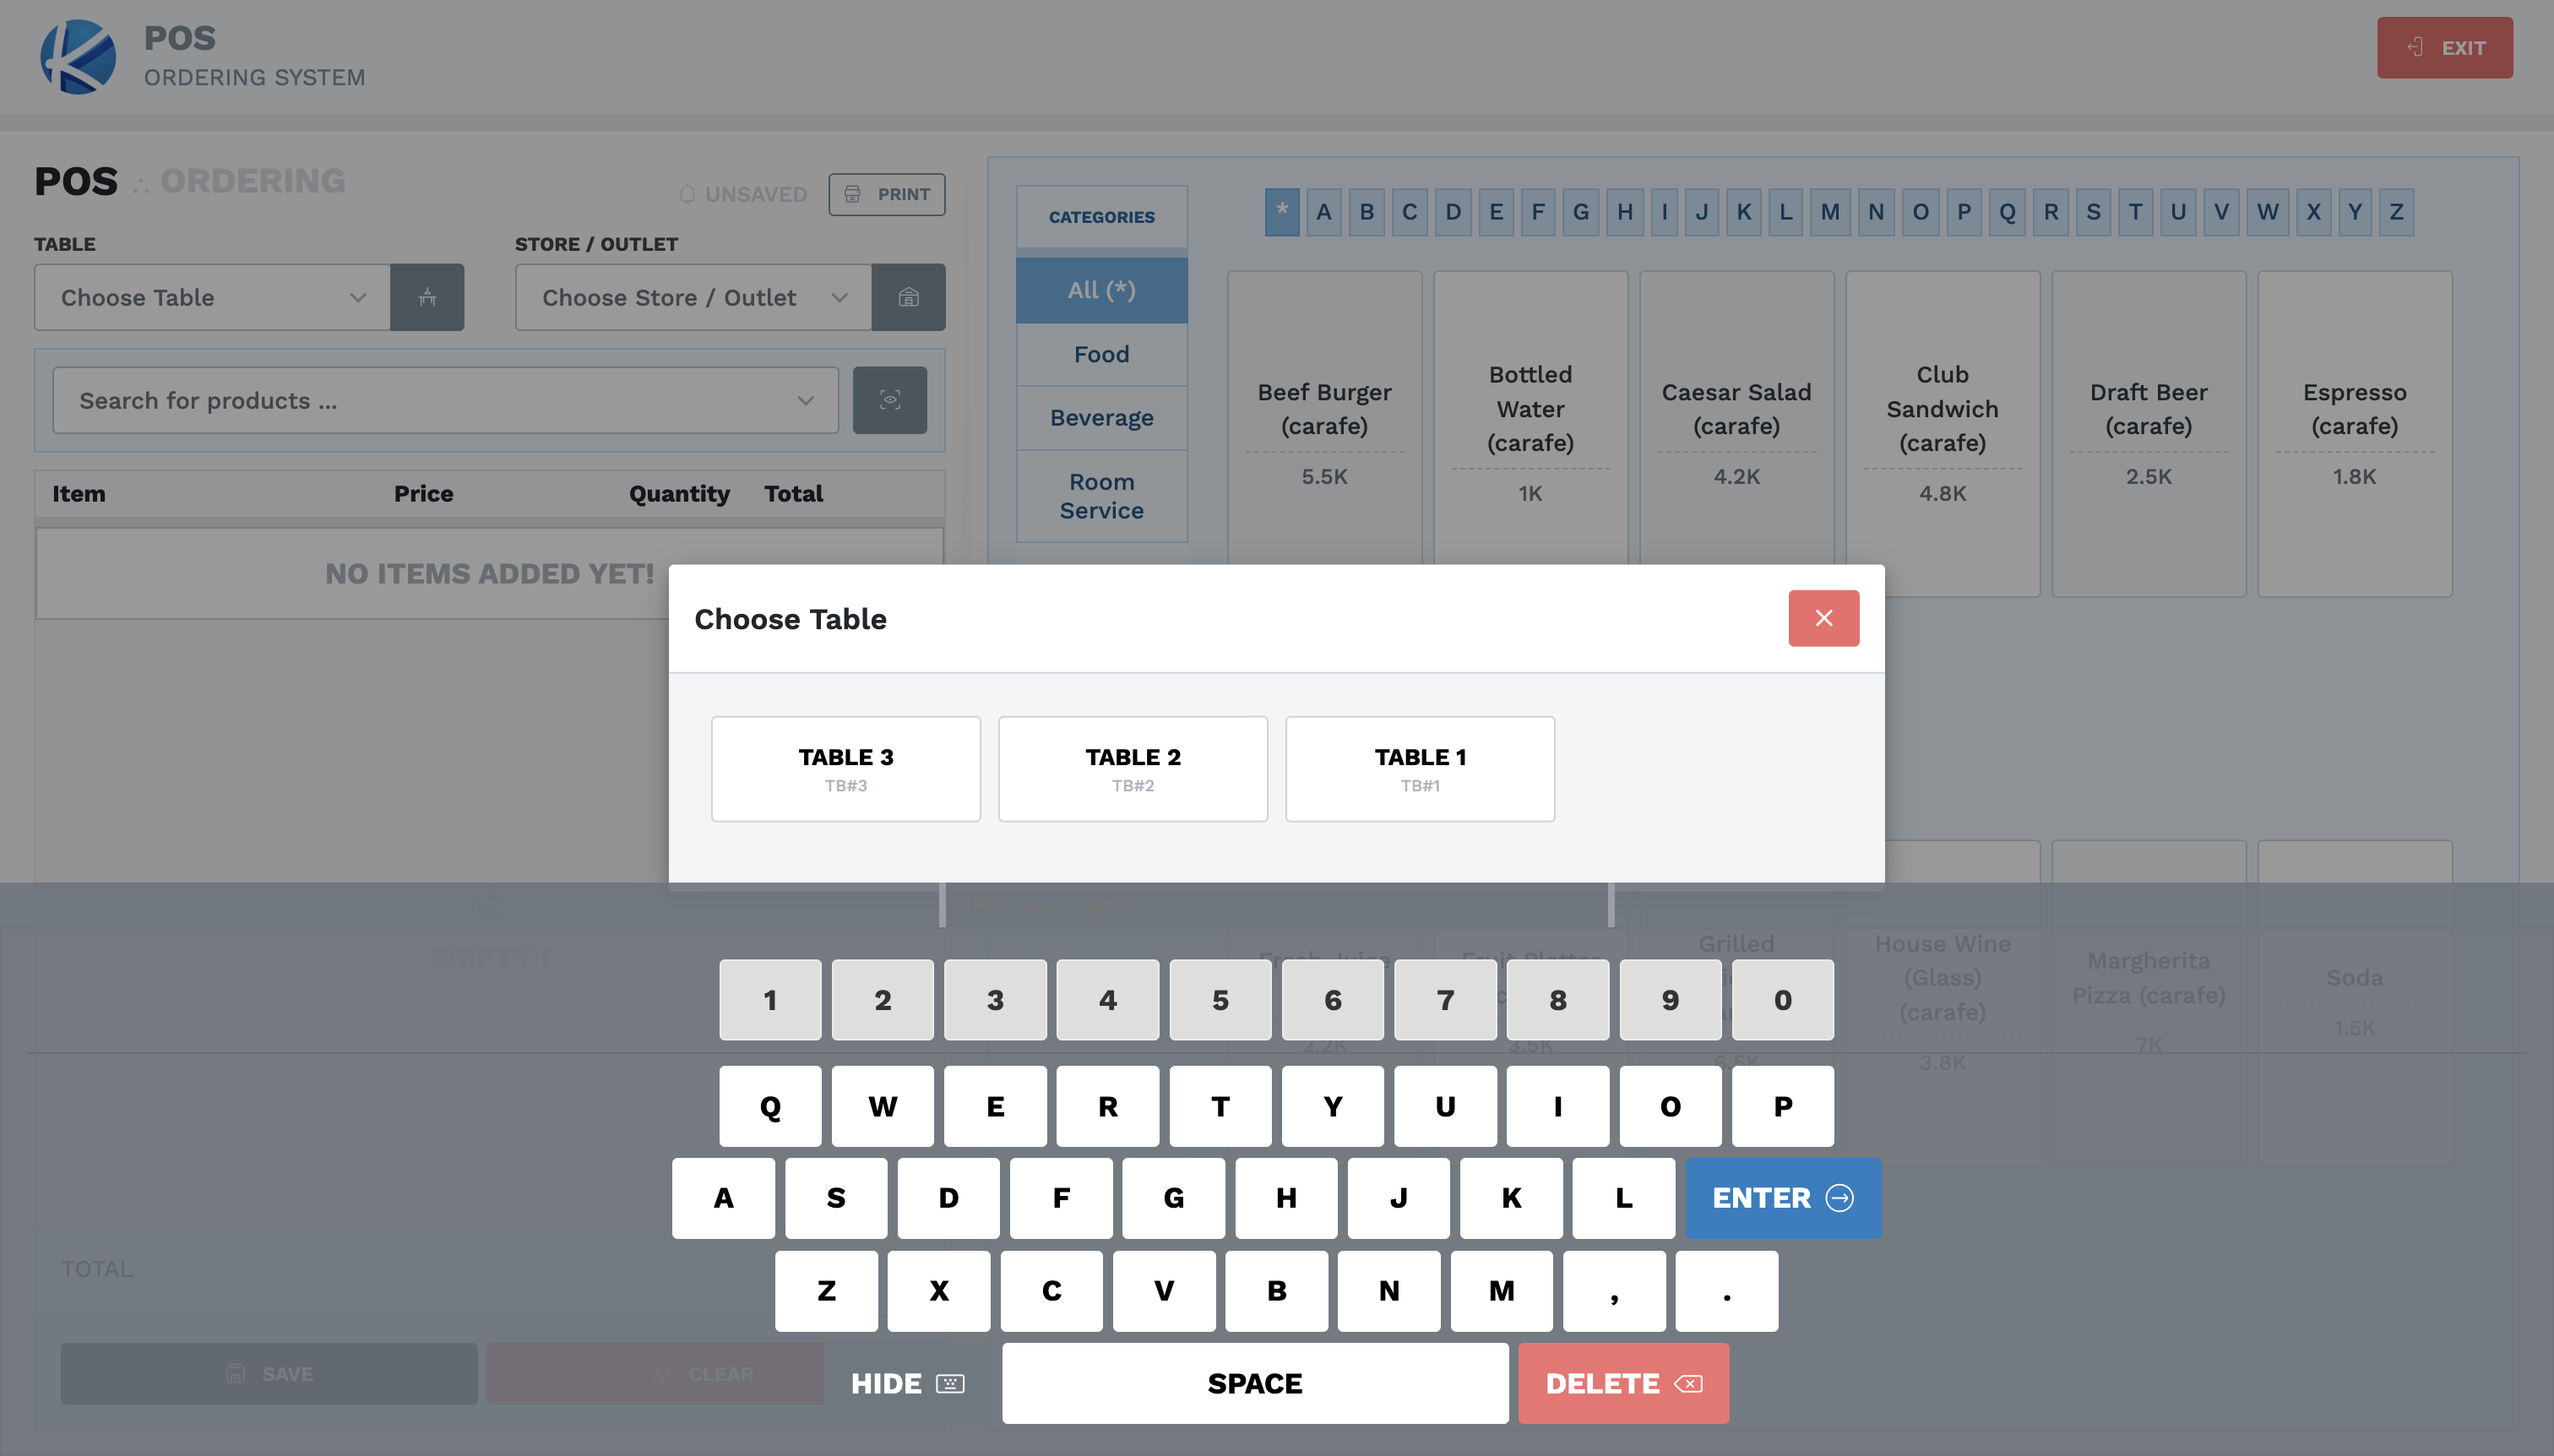
Confirm the tenant is correct, use your own waiter PIN, and obtain the table and guest request. Confirm the correct store/outlet if your site has more than one. Type part of the name in Table or Store / Outlet, or use the adjacent button to show all choices. If neither method returns the expected value, stop and report a setup issue; do not continue with a guessed or blank value.
Steps
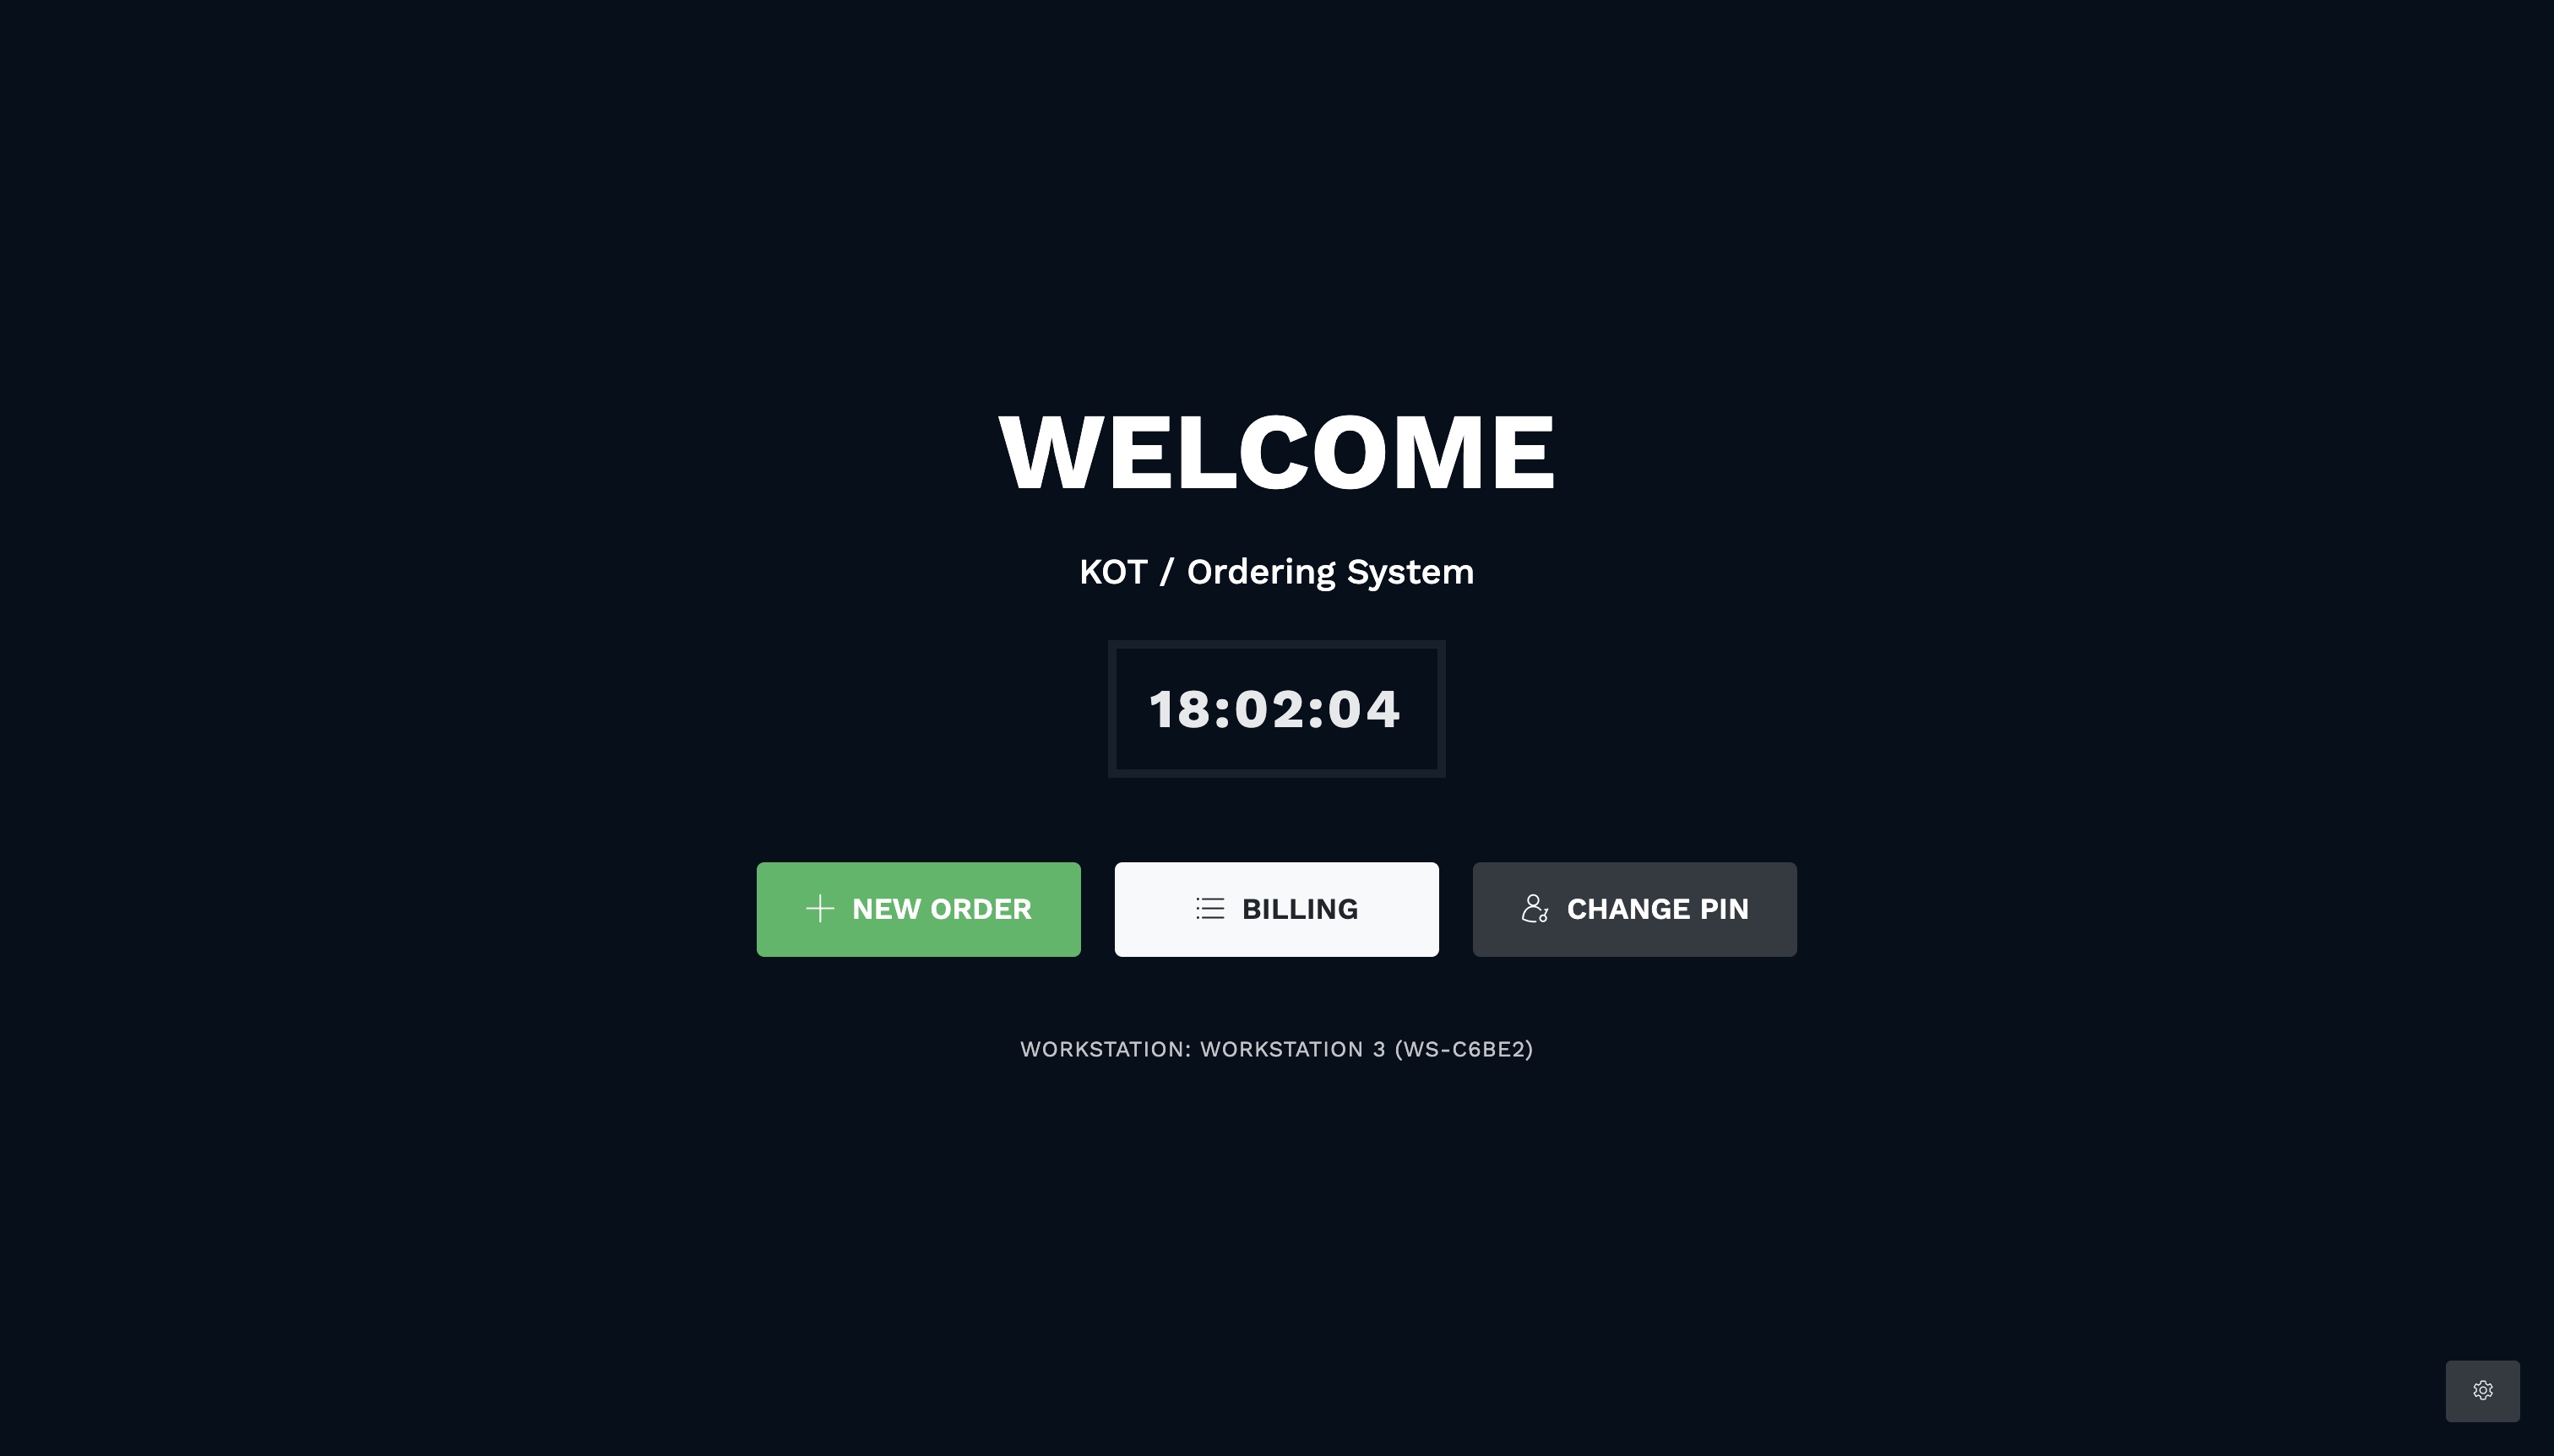
- From the waiter start screen, choose NEW ORDER.
-
Select the correct Table and Store.
-
Find and select each product. Selecting the same product and unit again increases its quantity.
- Review quantities. Correct mistakes before submission.
-
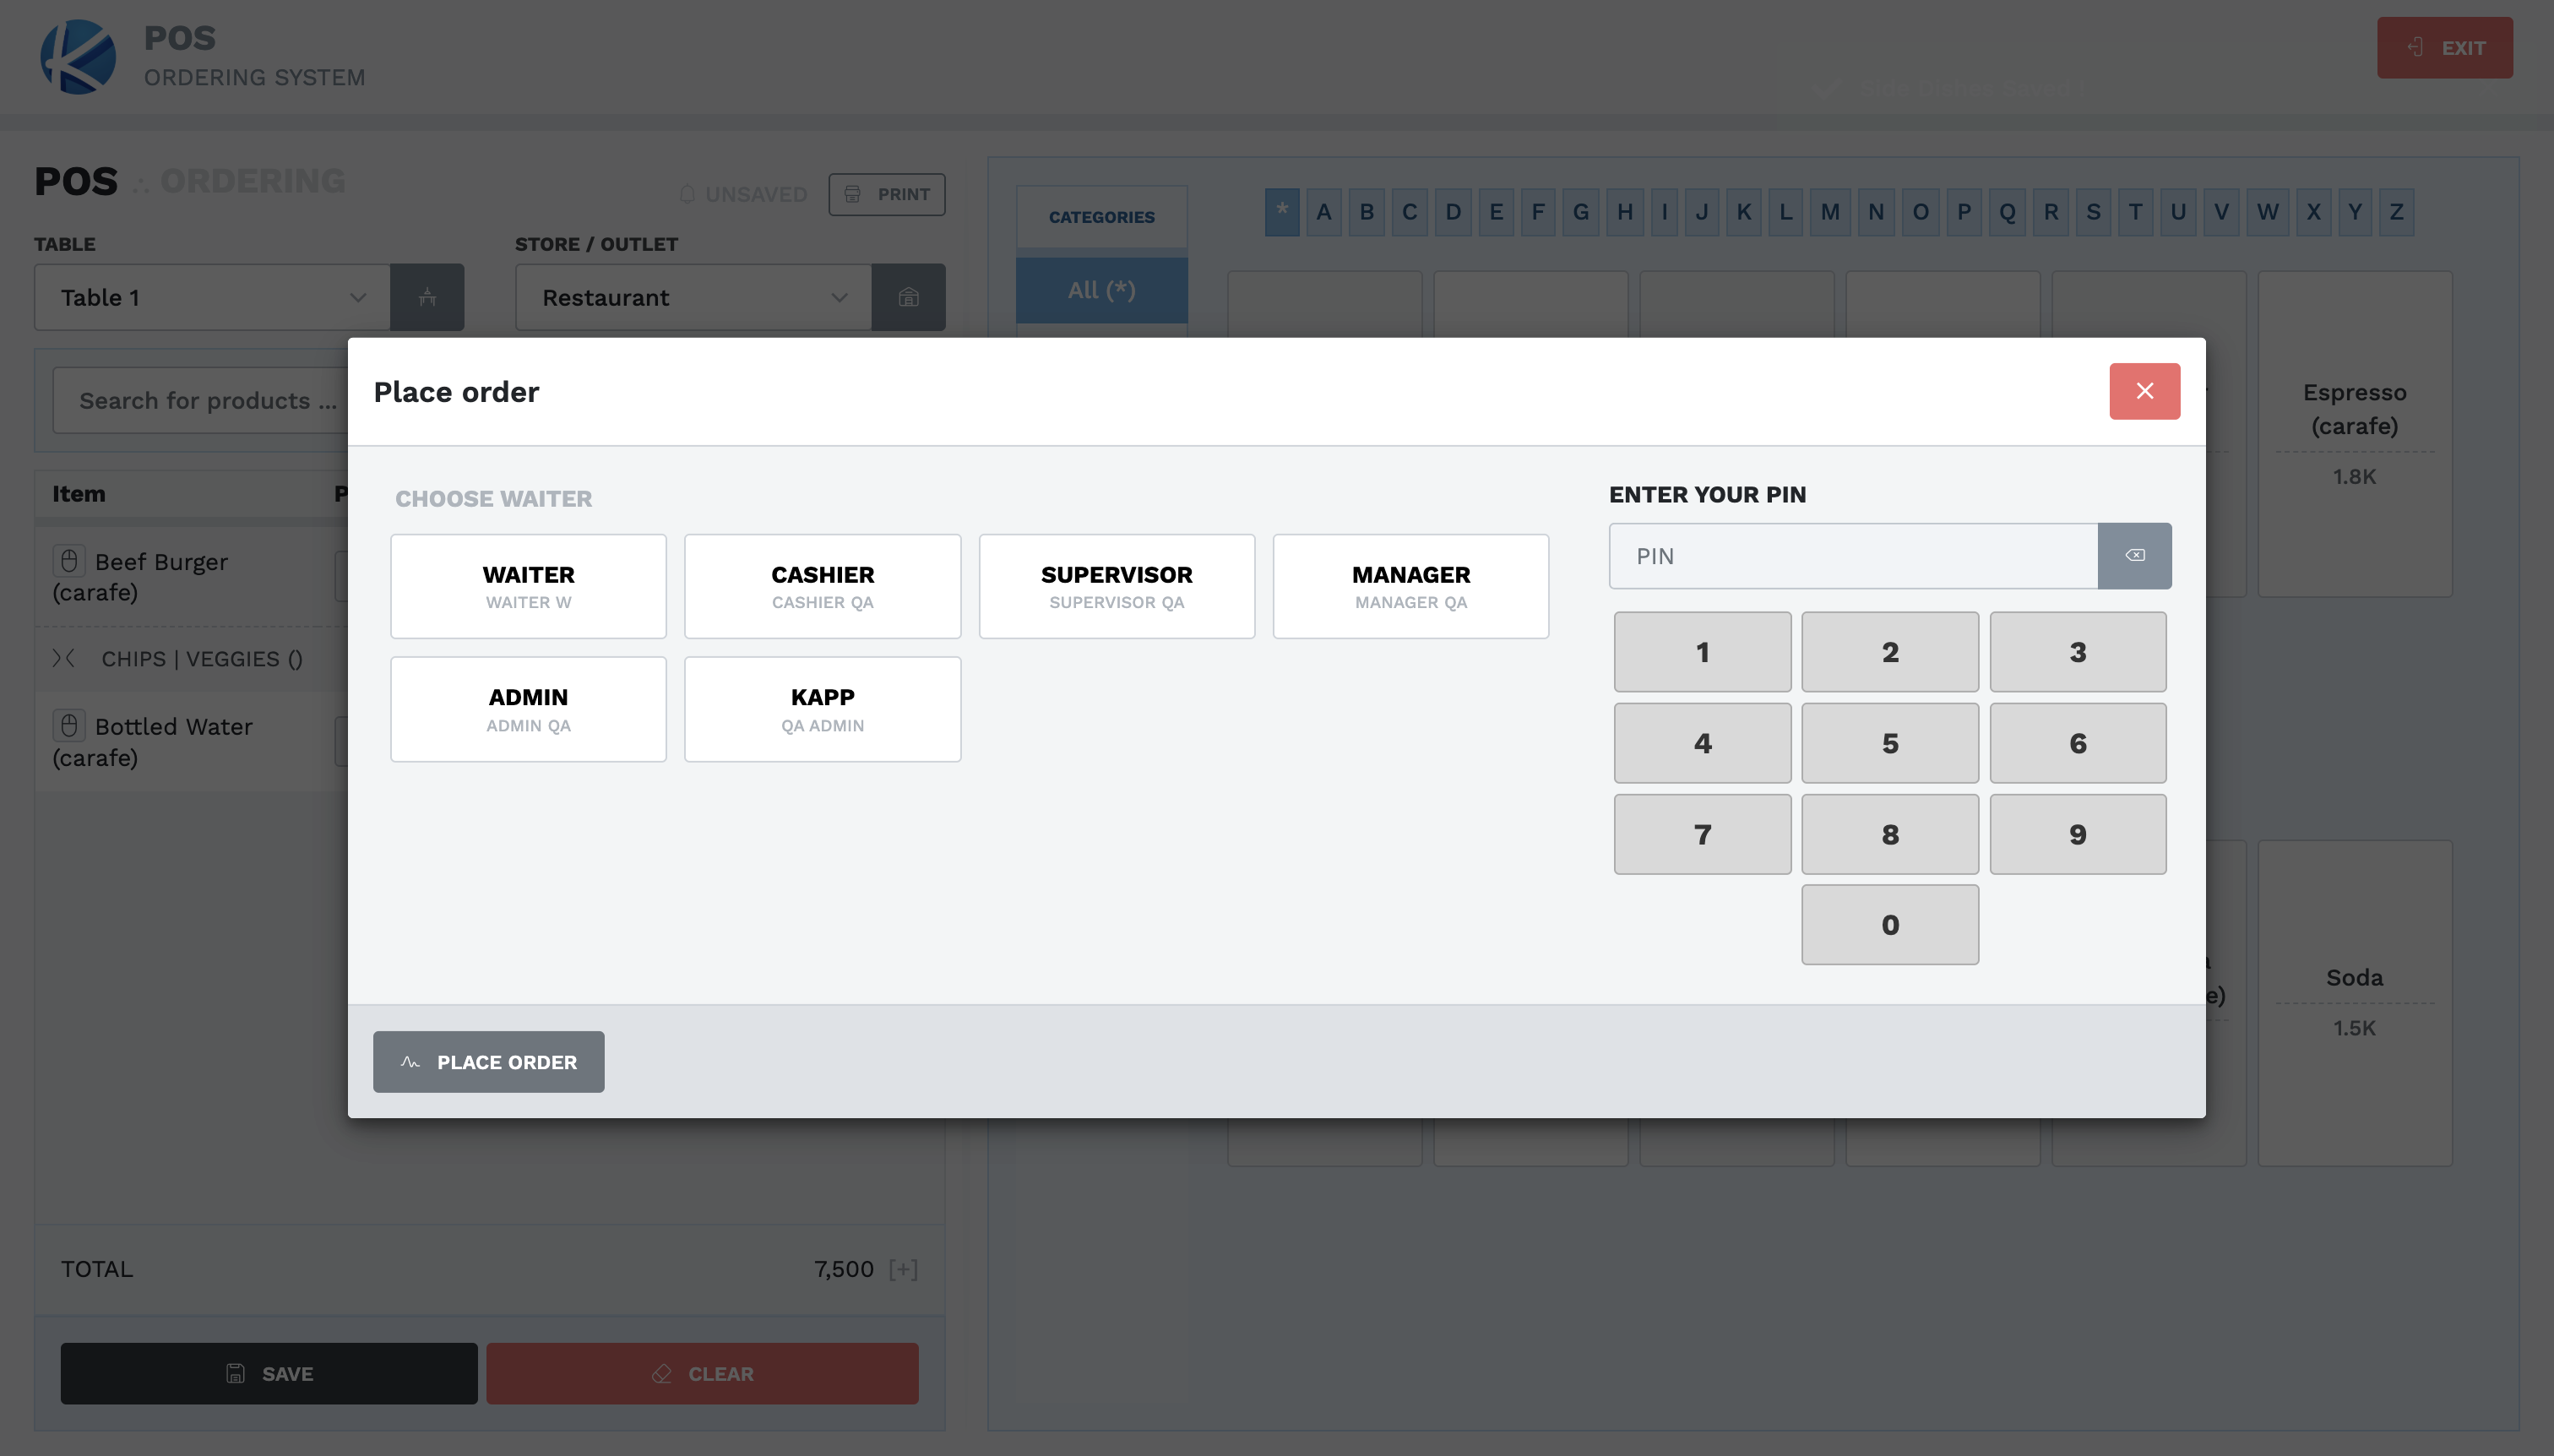
Select an item to open its options. Choose each permitted side dish (for example, CHIPS or VEGGIES) and add a note only when required. Select the item dialog's SAVE, then confirm the chosen sides appear beneath the intended item. Available sides are configured by the site.
-
Select SAVE to continue placing the order.
- In CHOOSE WAITER, select your own profile.
- Enter your PIN privately and select Place Order once.
- Confirm the order screen clears. Verify the order in Orders or the configured kitchen output before assuming it was accepted. Do not depend on MY BILLS if it cannot display the bills.
The PIN authorizes this action and records which waiter placed the order. It does not create a persistent waiter login session. Expect to select your waiter identity and enter the PIN again when another protected action requires it.
Expected result
The order is saved for the selected table and store, the active order clears, and the Orders report or kitchen output contains the correct items and options.
If something goes wrong
- “Please add items to your order”: add at least one item.
- “Table & Store Fields are required”: select both before submitting.
- “Login failed!” appears during PIN authorization: confirm you selected your own profile and re-enter your PIN privately. Escalate repeated failures; do not borrow another PIN. Despite the message text, the PIN check does not persistently log the waiter in.
- No confirmation or timeout: do not submit again immediately. Check whether the order exists, then escalate if its status remains unclear.
- Printer fails after Order Sent: the order may still be saved. Verify it; do not recreate it merely to obtain a printout.
Tell products apart by their unit
A product sold in more than one unit appears once for each unit, and each one has its own price.
- The unit is in brackets after the name — Beer (crate), Water (box).
- A plain name with no brackets is the single piece — Beer is one bottle.
- Only the units the site allows for selling are shown.
- Selecting the same product and the same unit again increases that line's quantity instead of adding a second line.
Check the unit before you add the item, and again in the order before you place it. Choosing the crate instead of the bottle charges the customer for a crate and takes a crate out of stock.
View open orders
If MY BILLS cannot display the bills, do not use it as the only proof that an order or bill exists. Use the authorized Orders or Bills list, or the configured kitchen/receipt output, and ask for help with the time and waiter identity. Never resubmit solely because MY BILLS failed.
Correct an order
Before selecting Place Order, correct the item, quantity, side, note, table, or store on the order screen. Use Clear and rebuild the order if that is safer. Review everything again before saving.
After an order has been placed, it cannot be edited or moved to another table from the saved-order screen. Record the order ID and ask a Supervisor to cancel it when required, then place a new correct order. Do not create a second order until the Supervisor confirms what should happen to the first one.
If another kitchen copy is required, ask the authorized user to open the saved order and try Print. If no copy is produced, verify that the order is saved and use the site's print fallback. Never place the order again just to obtain a printout.
The first kitchen-order print is the normal copy. Printing it again requires a Supervisor role or above. Give the Supervisor the order ID and the reason a new copy is needed.
Combine orders into a customer bill
A table may have several orders, and a waiter may serve several tables. Create the bill from the table whose customer is ready; placing an order does not create a bill automatically.
- Return to the KOT start screen and select BILLING.
- Select your own waiter identity, enter your PIN privately, and select the UI button labelled LOGIN. This temporarily authorizes billing; it does not keep you logged in.
-
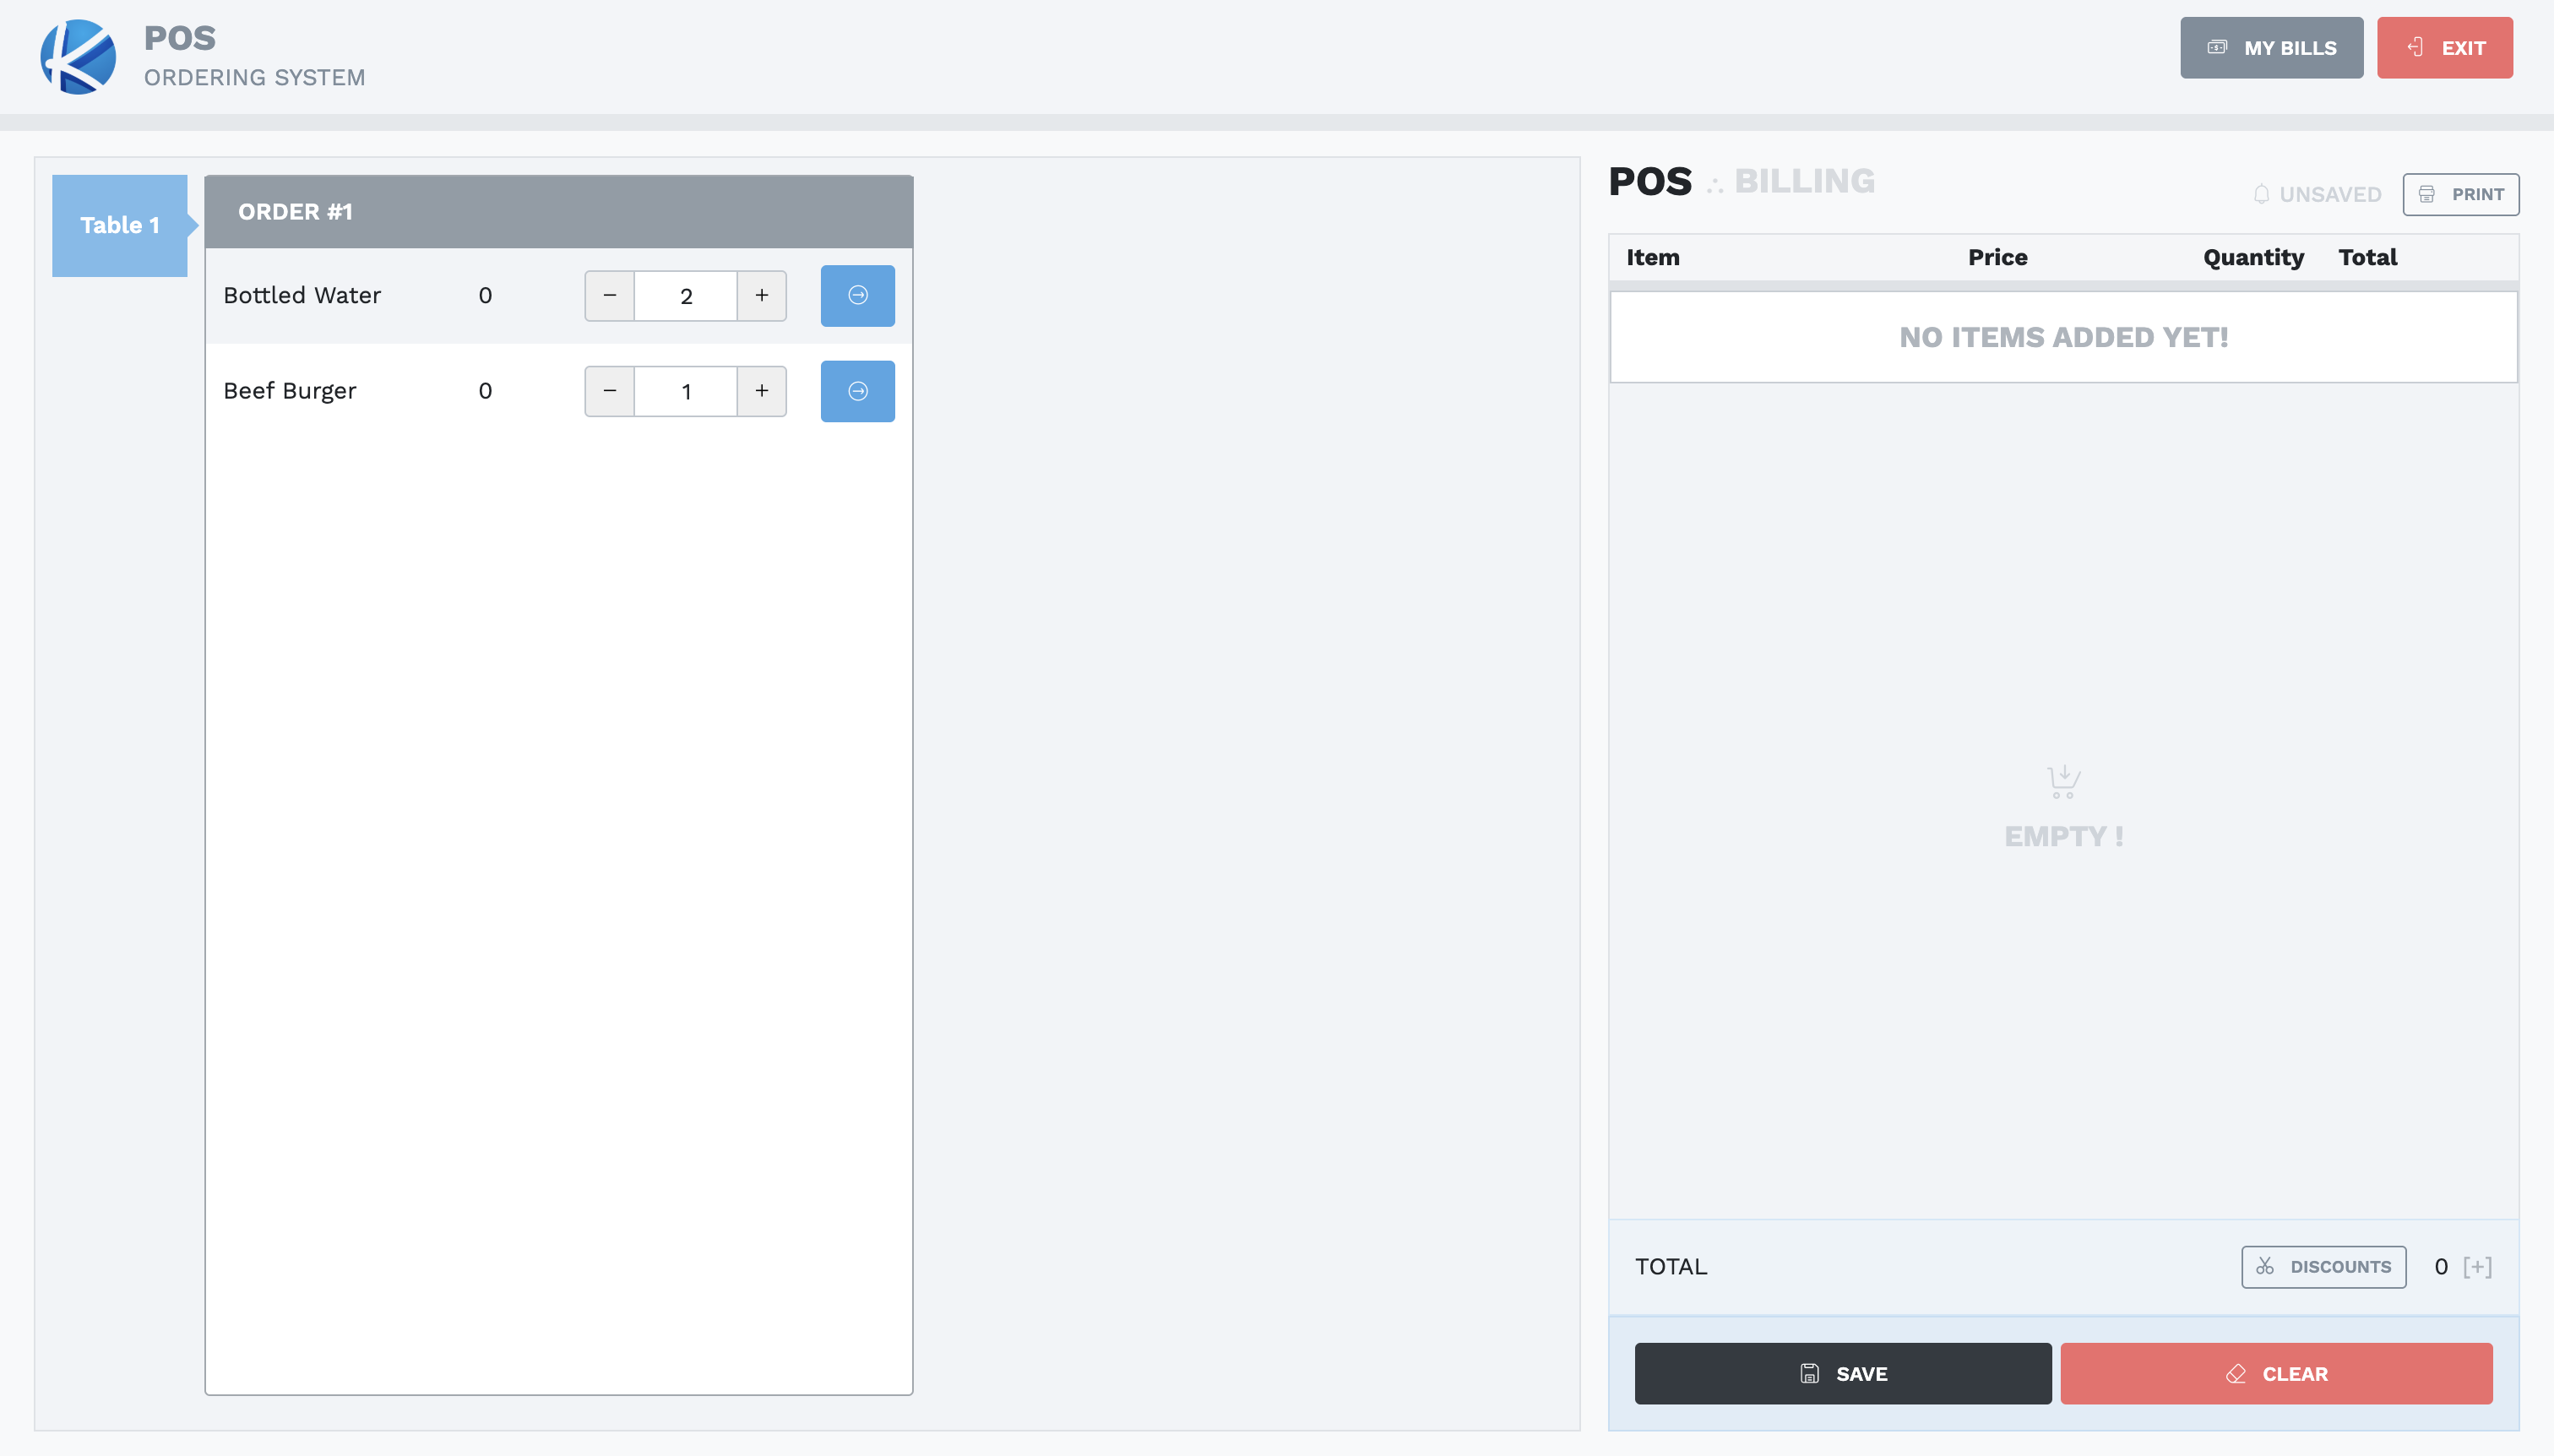
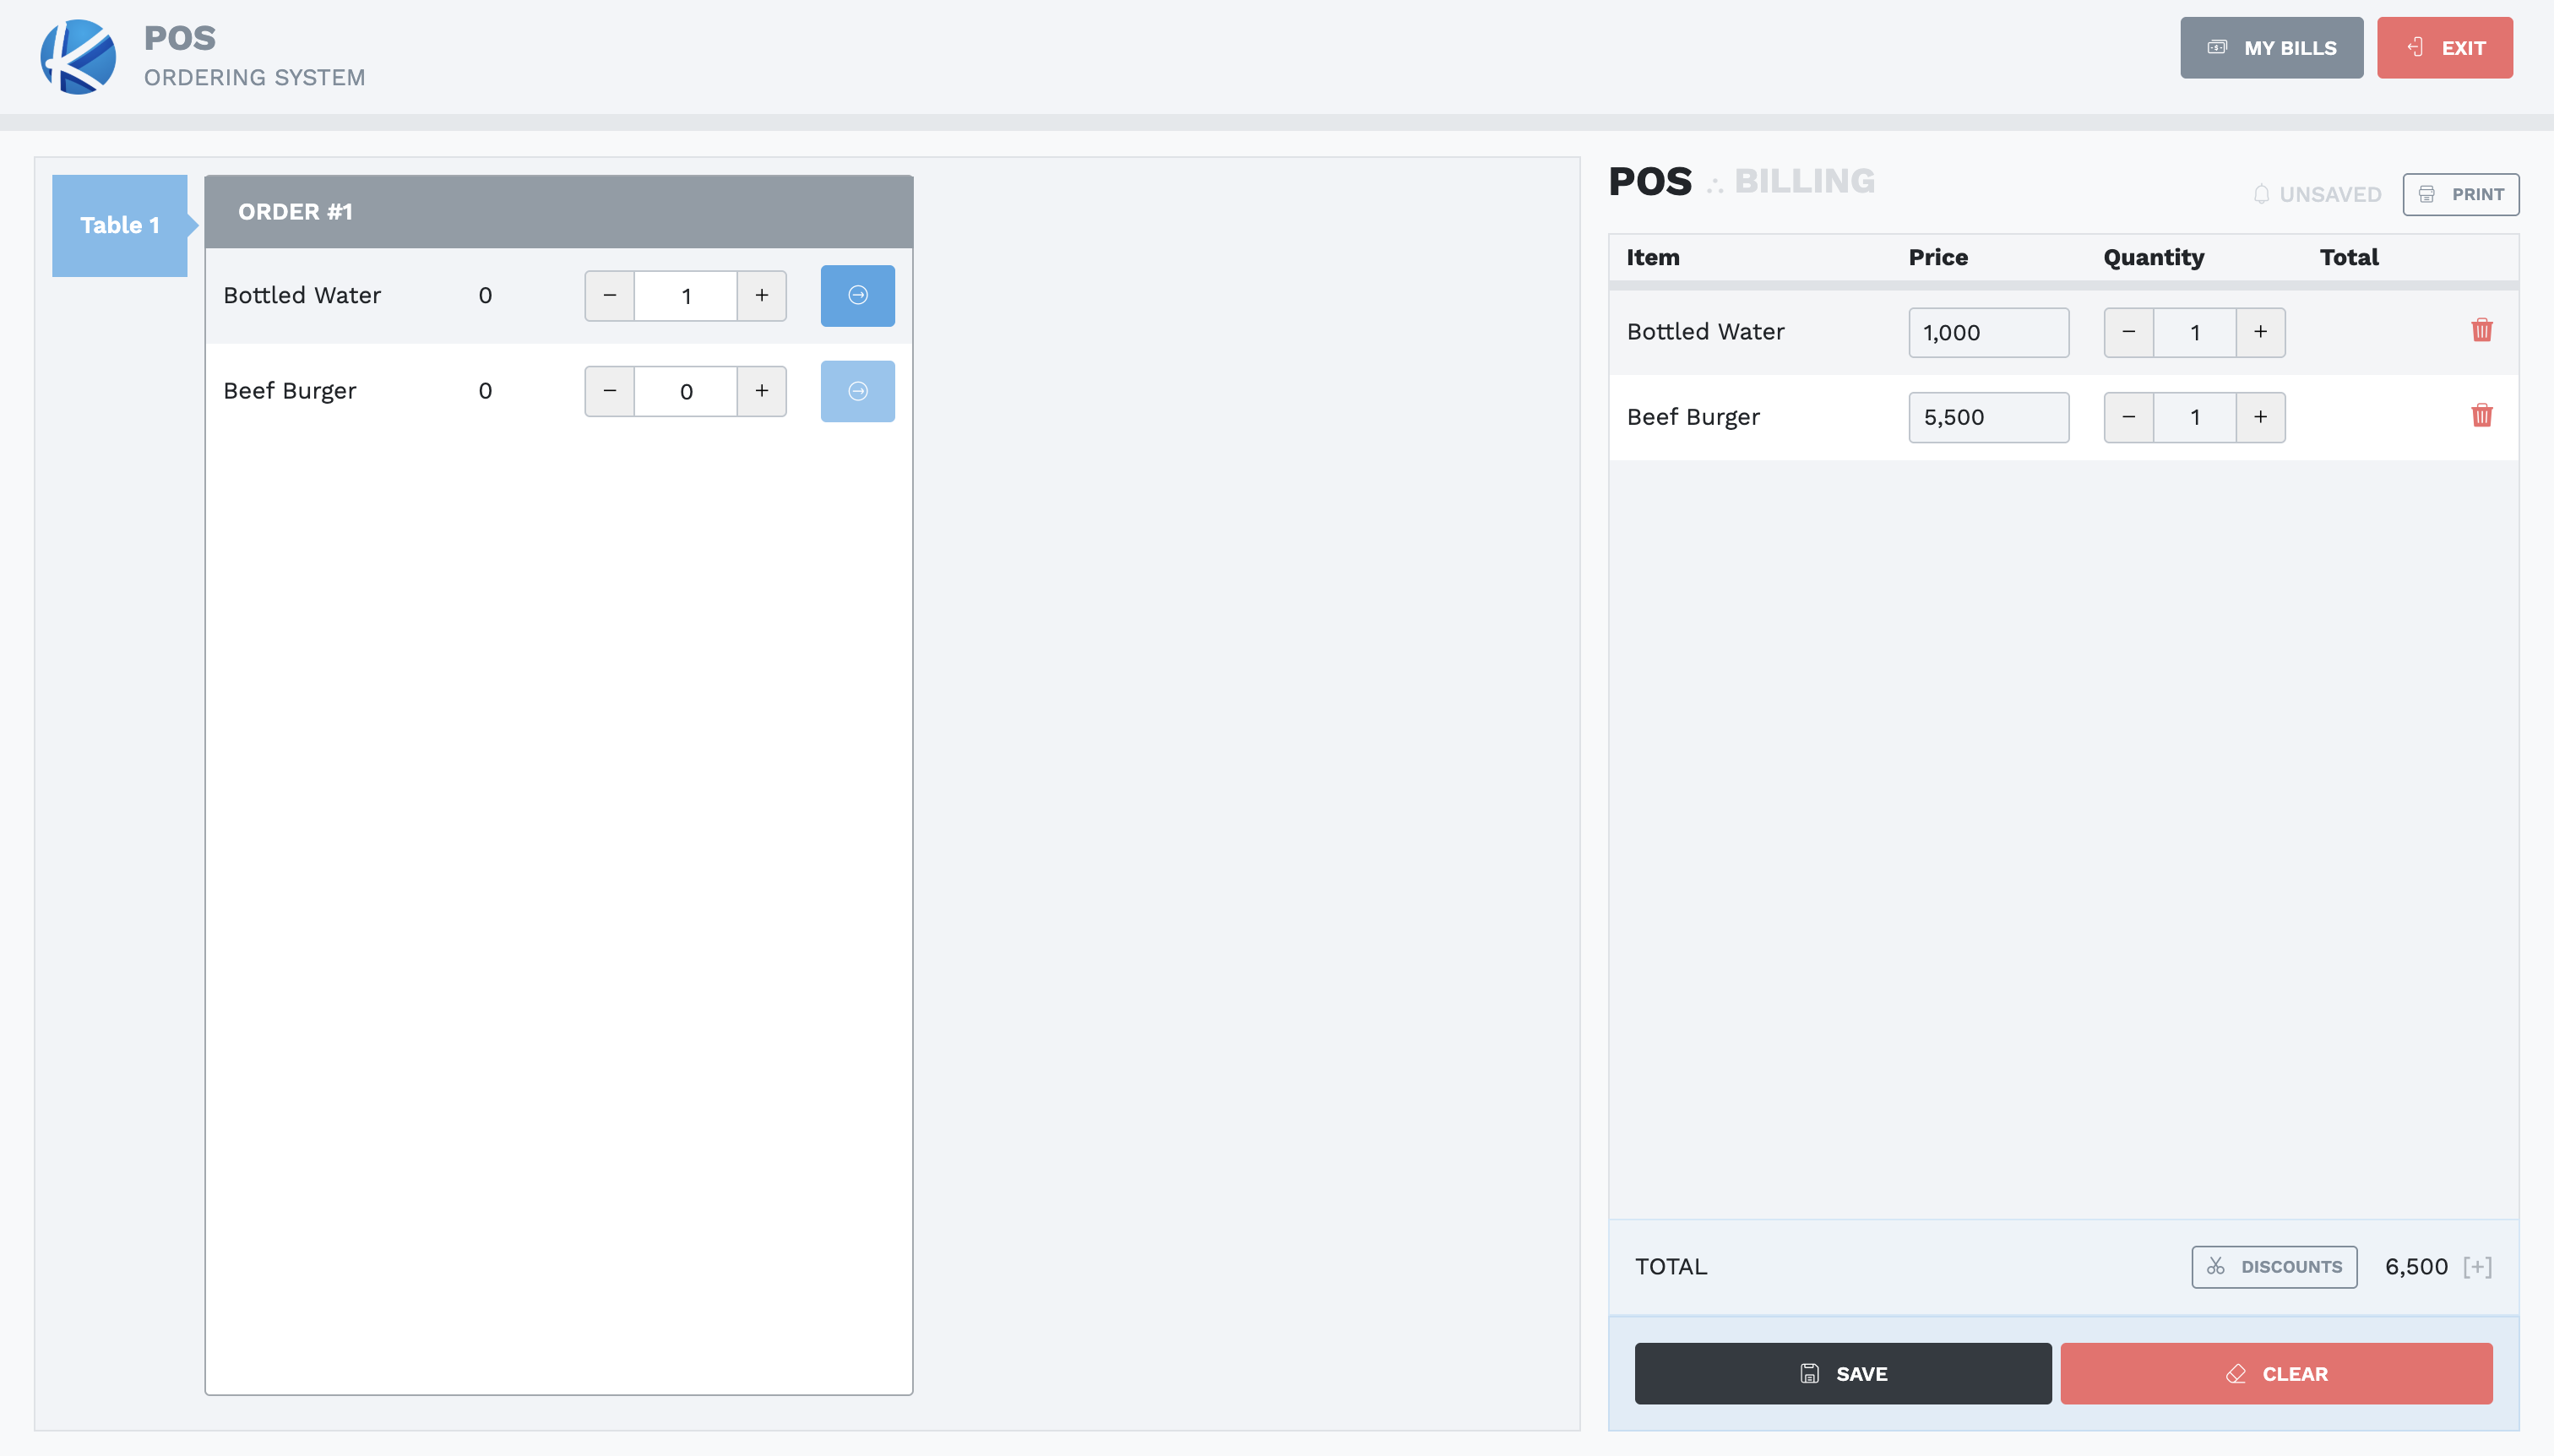
Select the correct table. Every unbilled order for that table appears on the left, grouped by order number.
-
For each line the customer is paying for, set the quantity with − and +, then select its blue transfer arrow. Repeat across as many orders as needed. To bill everything, transfer every remaining quantity; to split a bill, transfer only the requested quantities.
-
Review the items, quantities, and total in the POS · BILLING panel on the right. Use Remove Item or CLEAR to correct an unsaved selection.
-
Select SAVE once. Confirm the bill panel clears and verify the new bill in Bills or the configured printed output. Record the bill ID.
- Check that quantities not billed remain against the original table/order for a later bill.
Never combine items from a different table merely because the same waiter placed them. Saving creates the customer bill; it does not record payment.
Apply an authorized discount while billing
- Build and review the unsaved bill, then select DISCOUNTS.
-
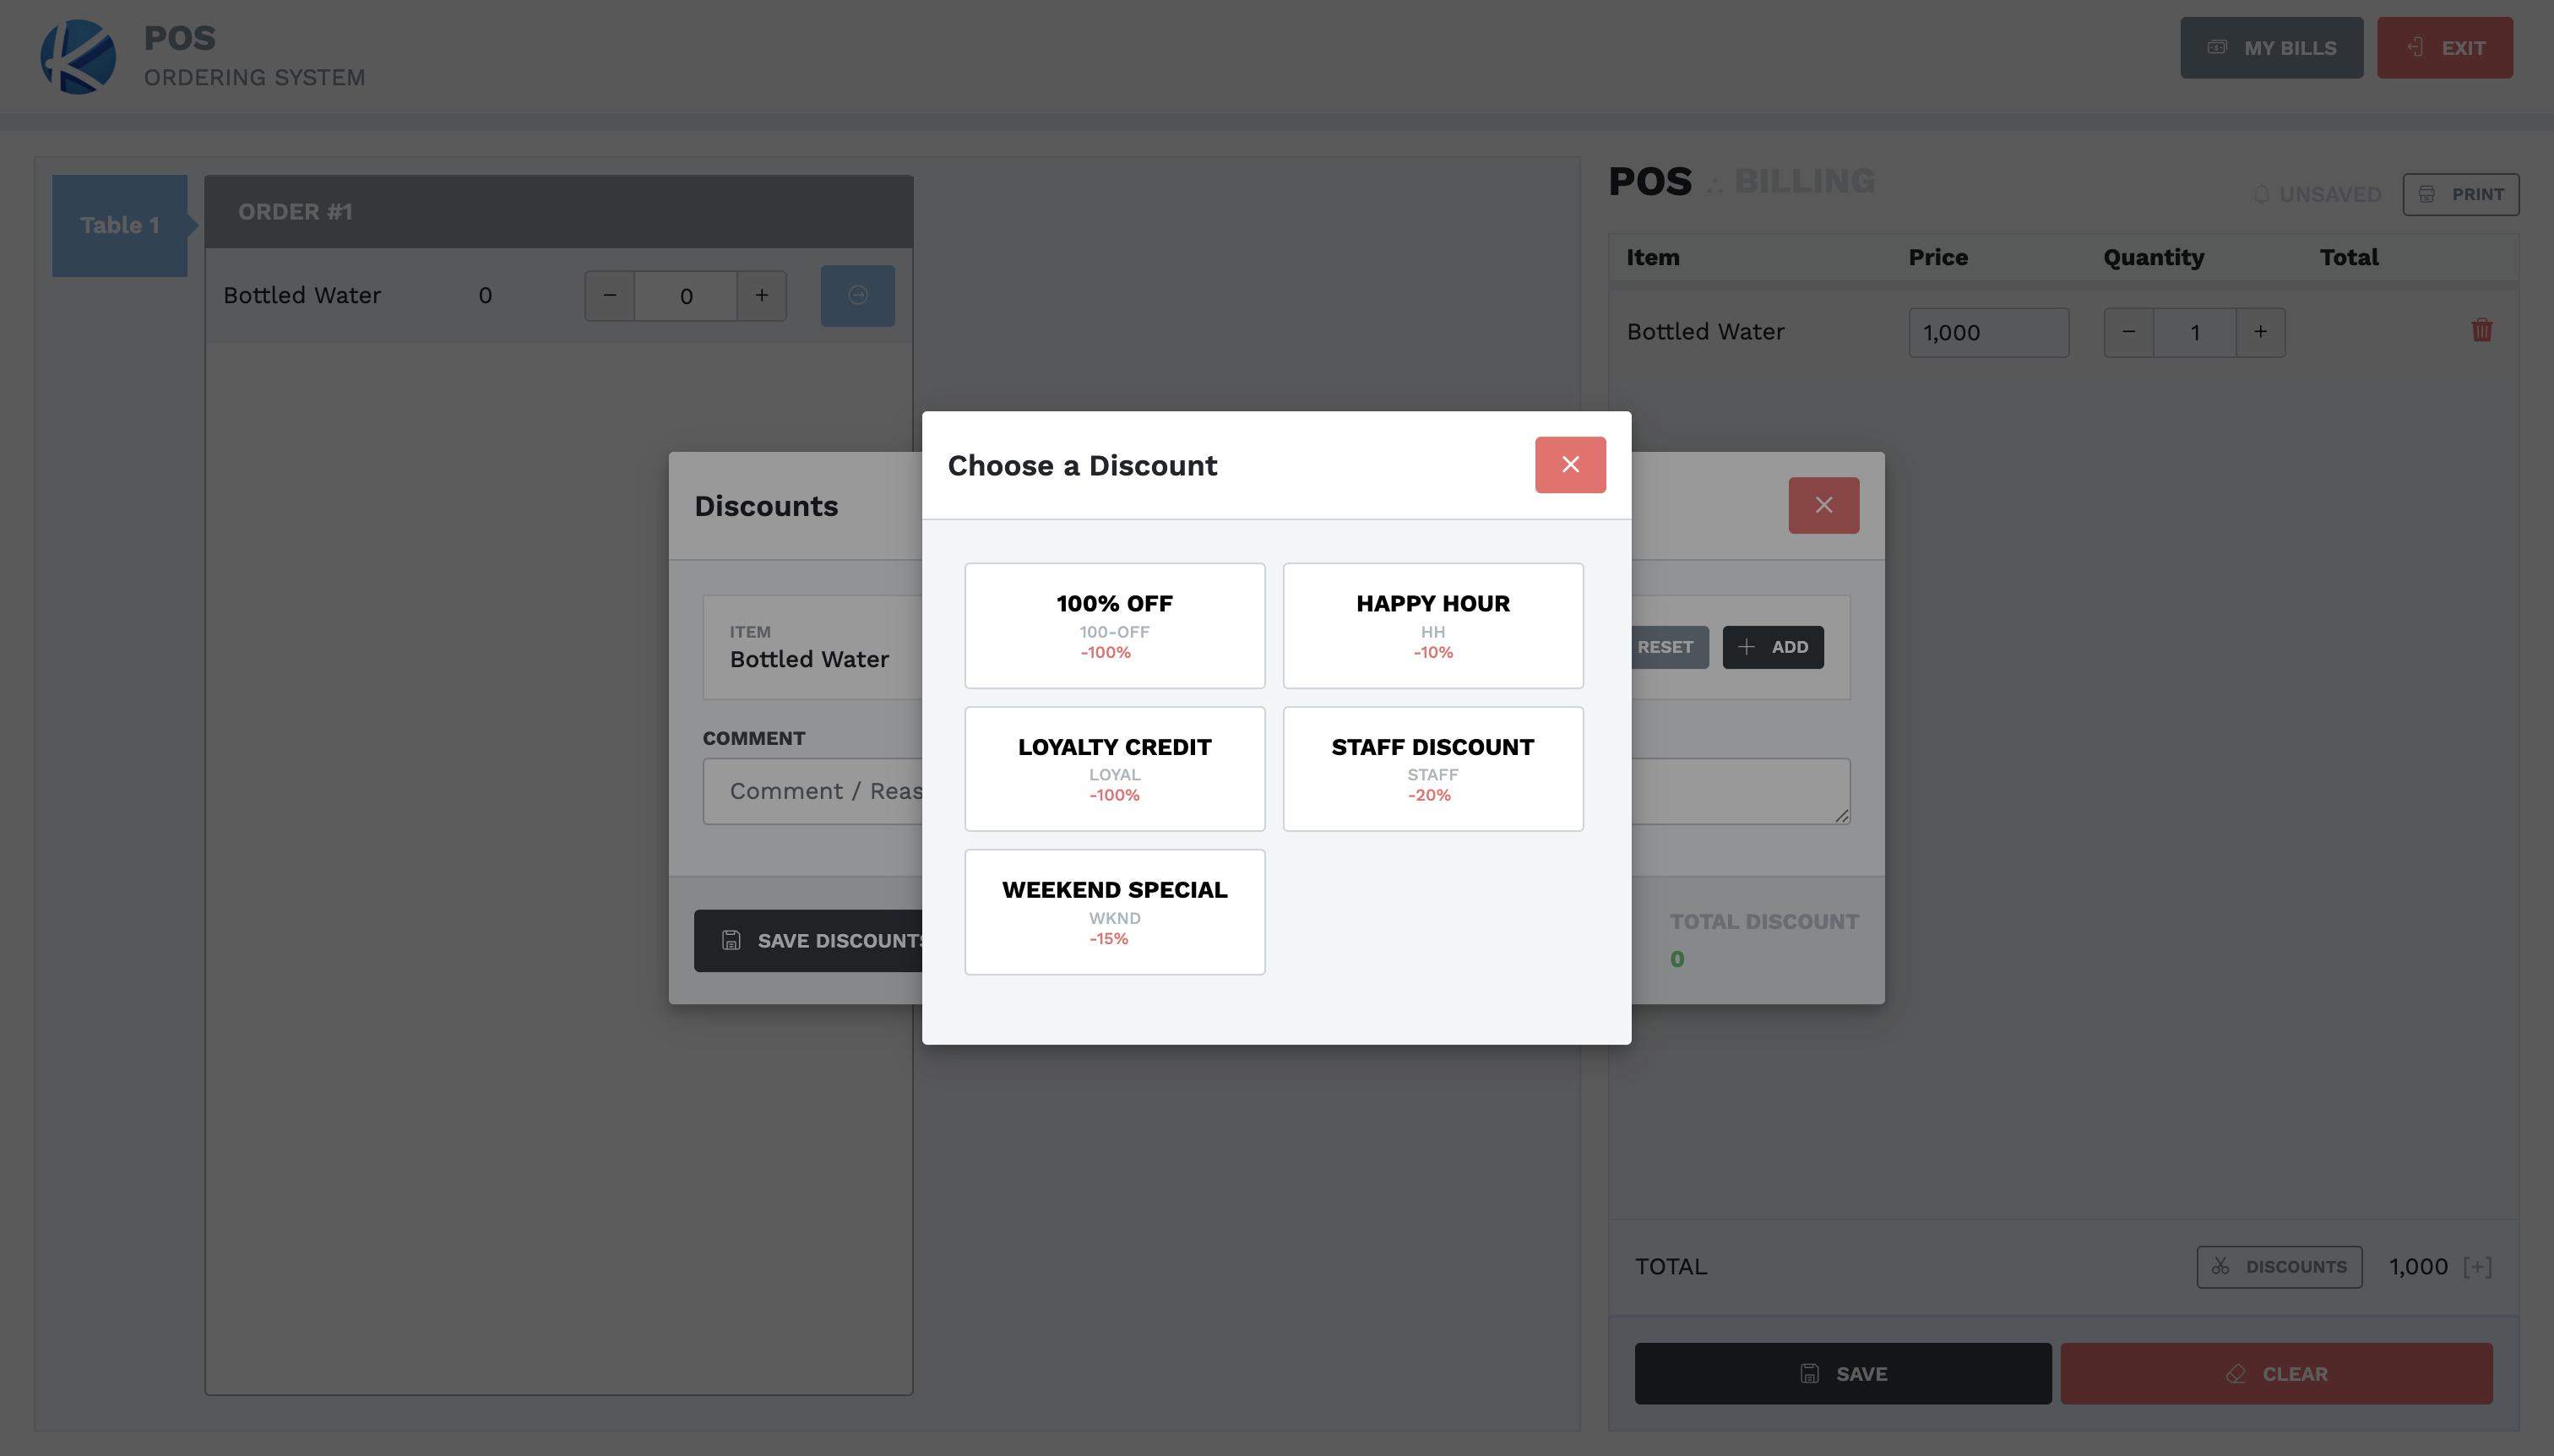
On the intended item, select ADD. Choose only the configured discount authorized by site policy; do not substitute a similarly named discount.
-
Verify the displayed percentage and calculated amount. Enter a clear Comment / Reason when policy requires it.
- Select SAVE DISCOUNTS and verify the original and discounted totals on the bill before selecting the bill's SAVE.
Discounts are configured choices, not free-form percentages. In the validated tenant, examples included Happy Hour 10%, Weekend Special 15%, Staff Discount 20%, and restricted 100% discounts. Availability does not itself grant permission. The cashier must verify the discount and final amount when taking payment.