Supervisor Guide
Use this guide for POS corrections, urgent service setup, staff access, and operational reports. These actions affect sales records or what other users can do, so check the request carefully before saving.
Cancel an order
Cancel an order when it should not proceed to billing.
- Open Orders and find the order ID.
- Open the order and confirm the waiter, table, store, items, and total.
- Select Cancel Order.
- Enter a clear, truthful reason.
- Confirm the cancellation.
- Check that Cancelled shows Yes and that the reason appears in the order details.
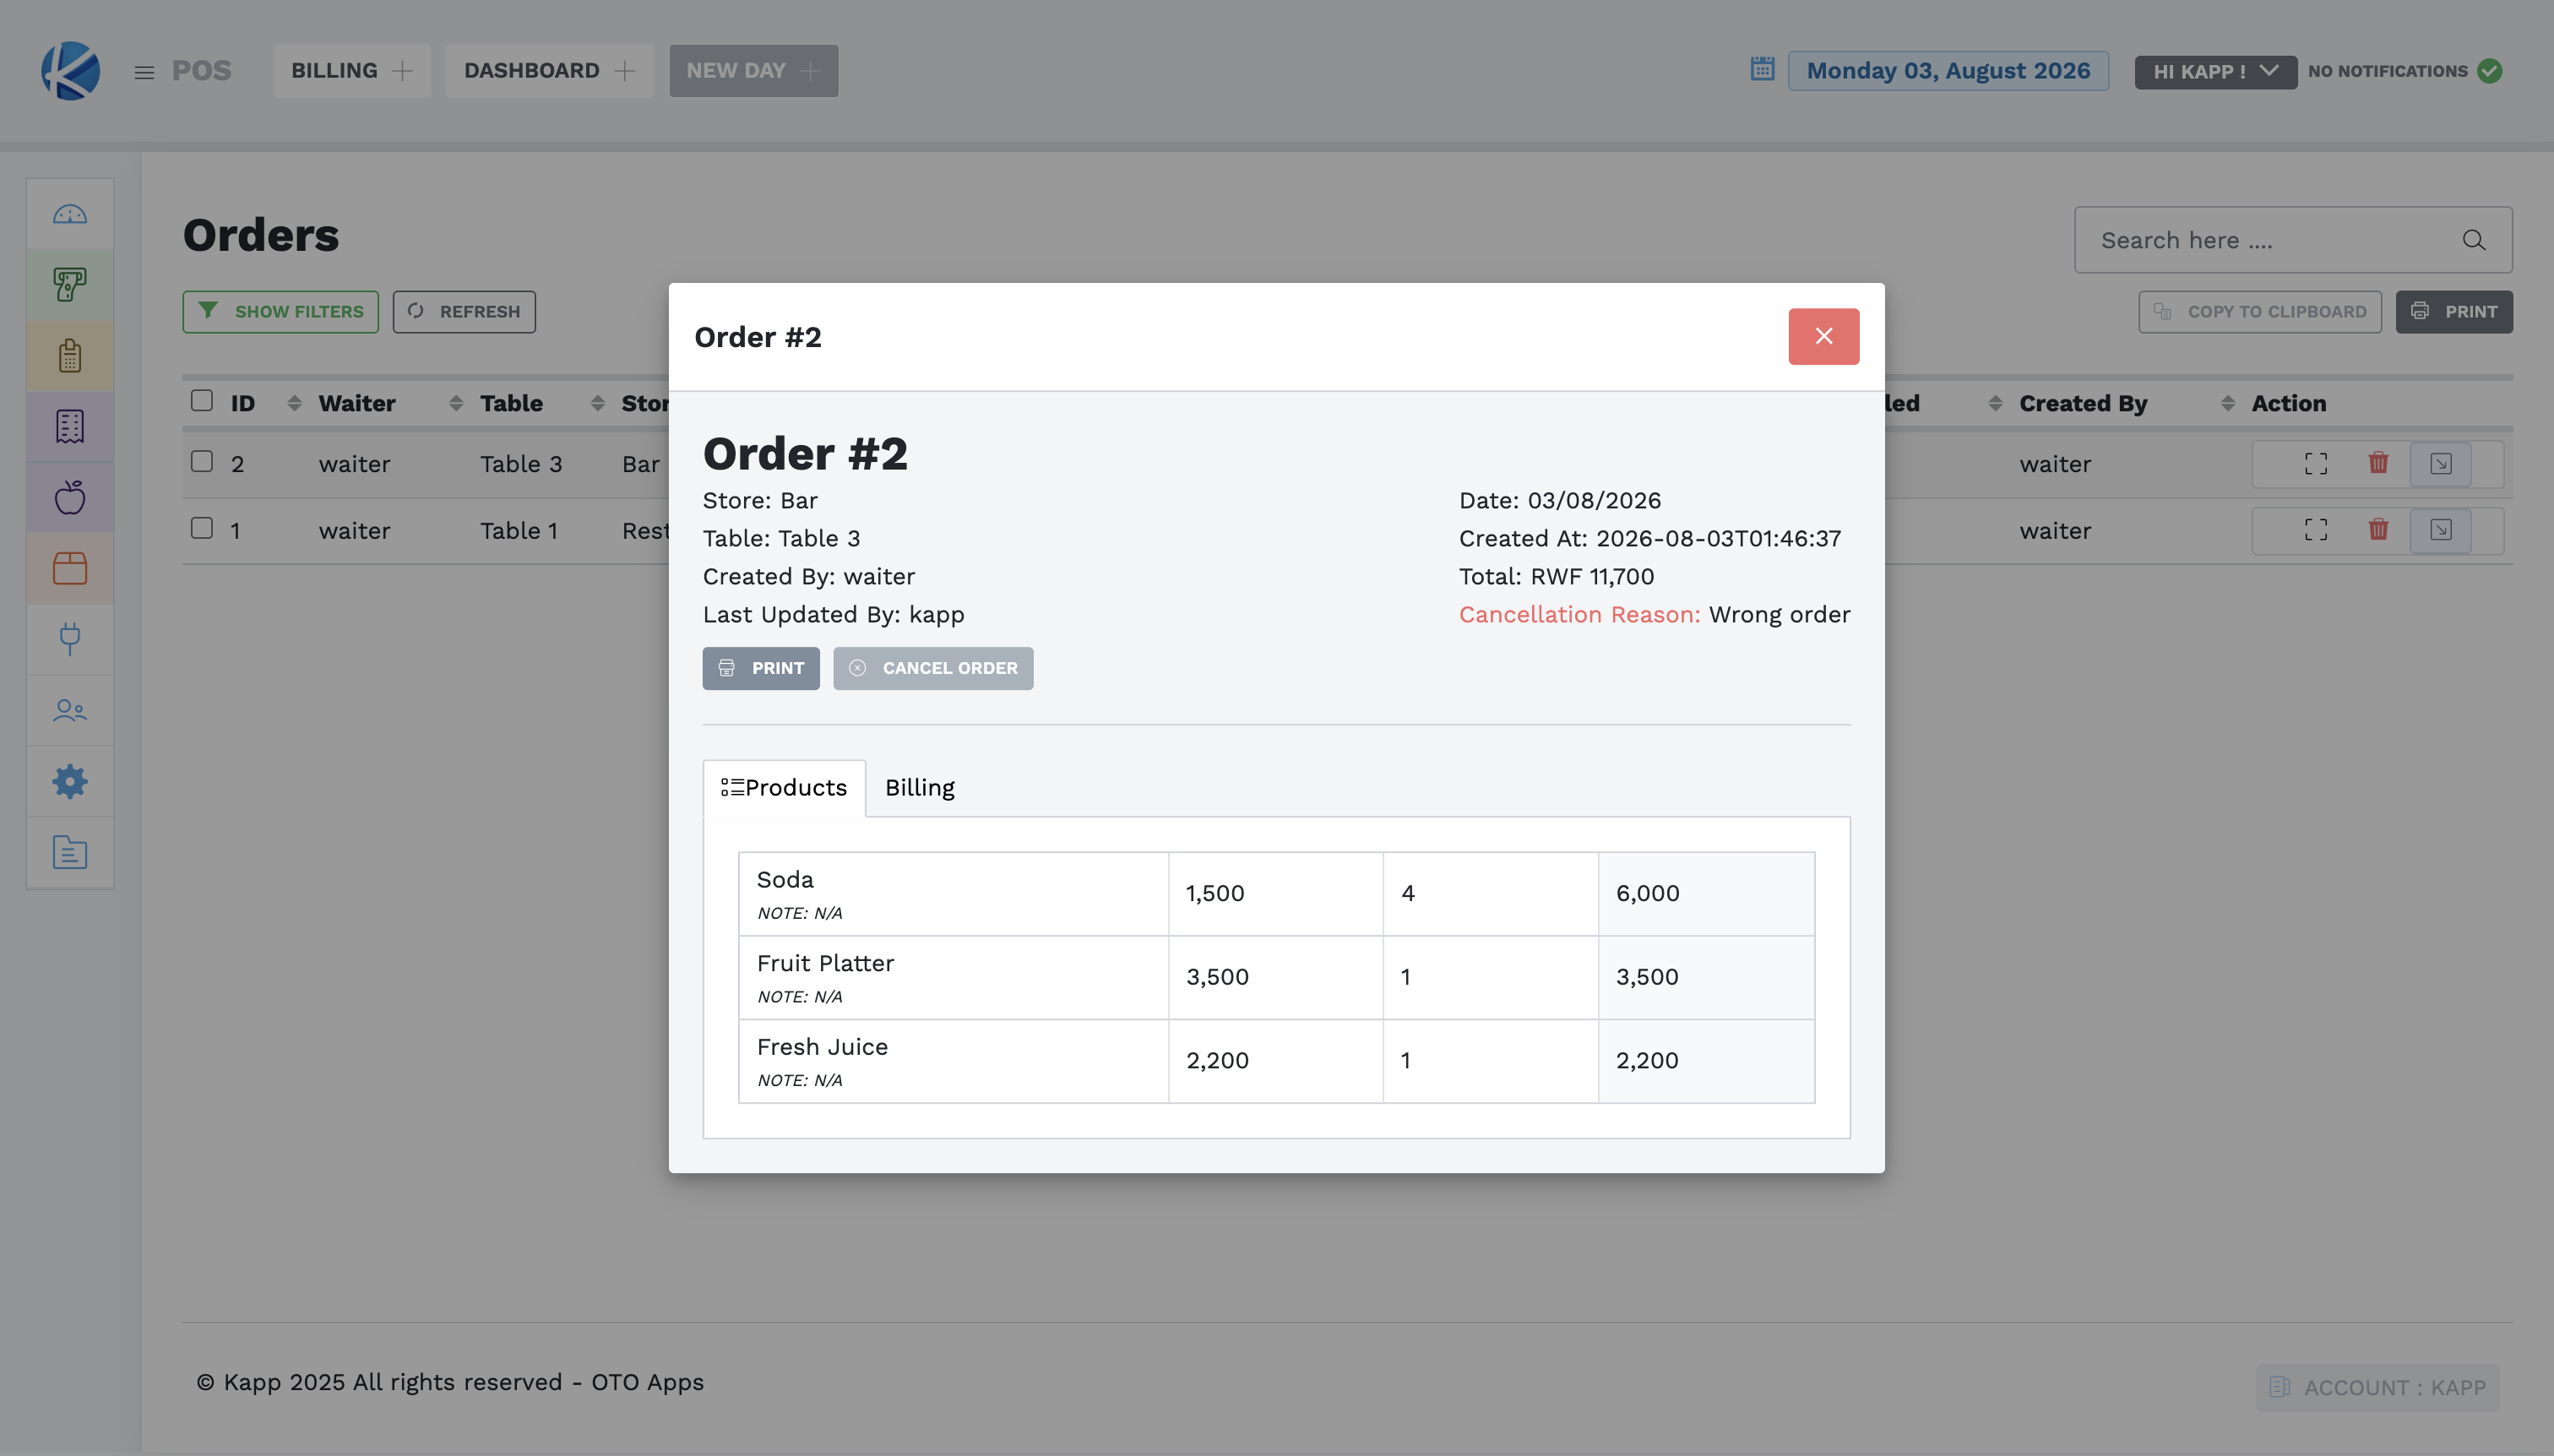
The cancelled order remains visible for review. It is not deleted. If a bill has already been created, review the bill separately before taking further action.
Cancel or refund a bill
- Open Bills and find the bill ID.
- Confirm the customer, waiter, items, total, payments, and balance.
- Select Cancel/Refund.
- Select the correct refund reason when required and enter a useful comment.
- Leave Also cancel the associated orders off unless the underlying order must also be cancelled.
- Select Cancel Bill once.
- Confirm that the cancellation reason appears and the action is no longer available.
- Generate Reports → Cancelled Bills for the correct date and confirm the bill is listed.
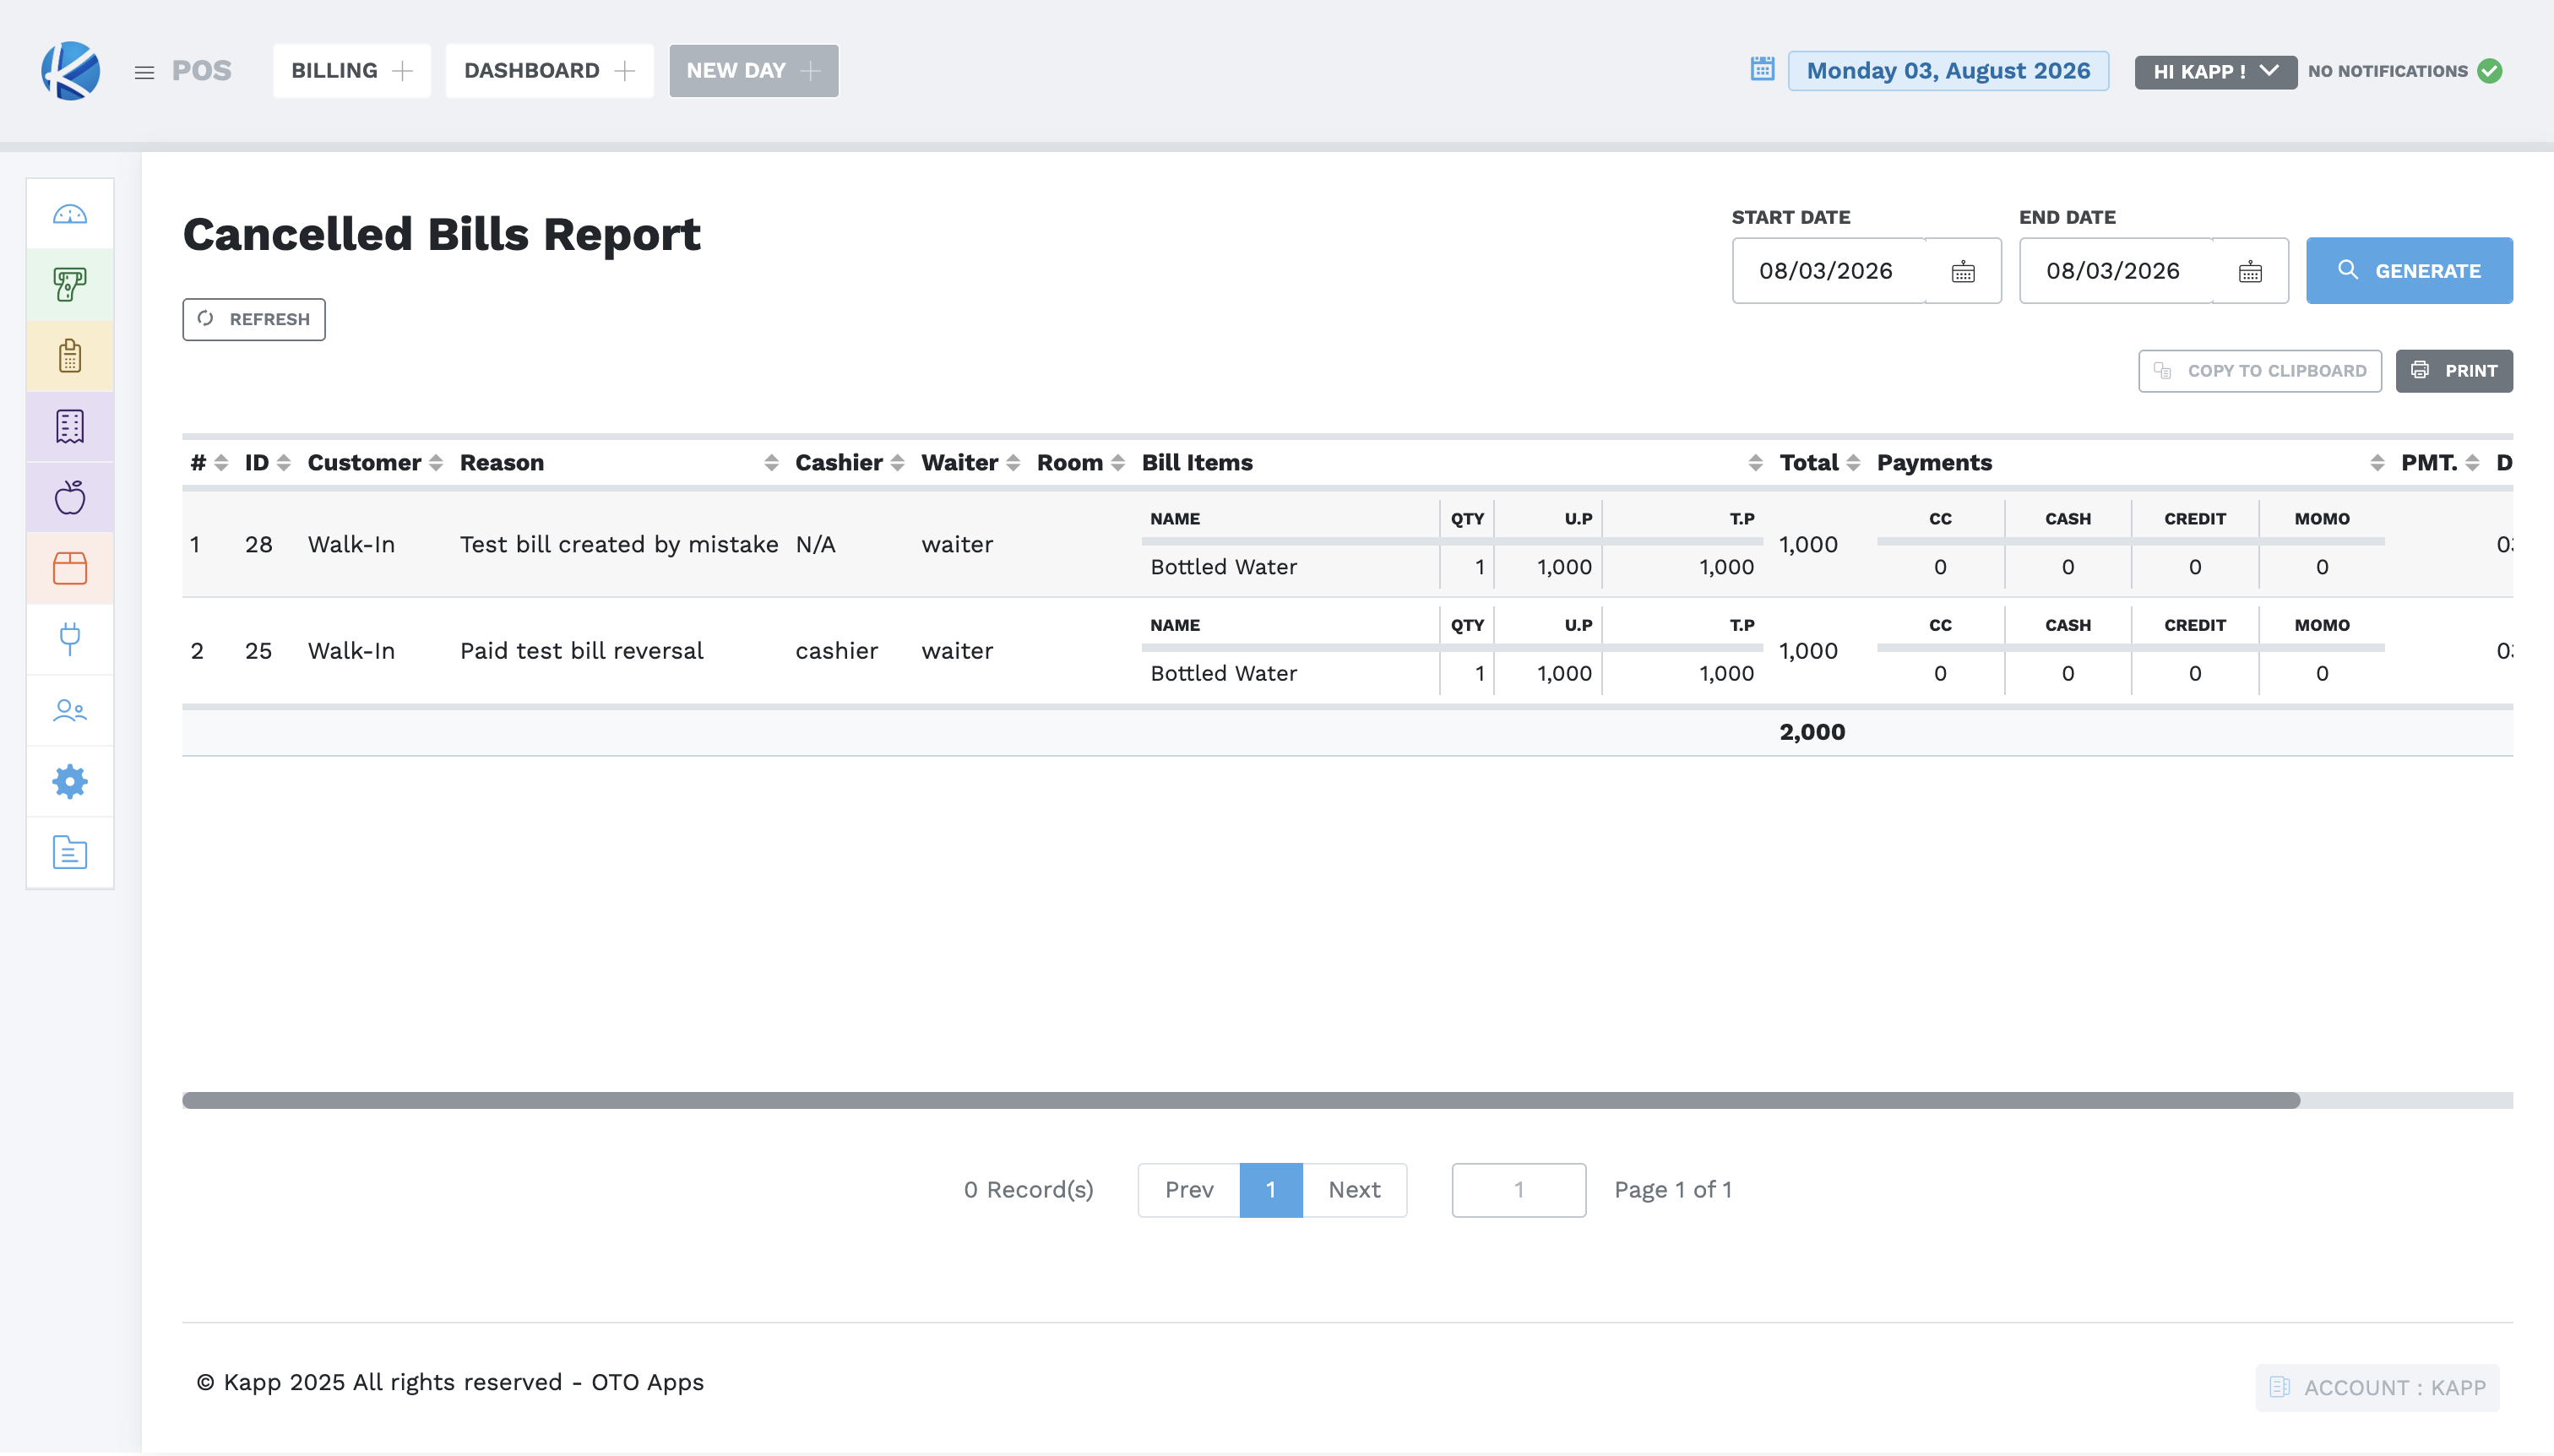
For a paid bill, cancellation reverses the whole completed bill. It is not the same as removing one mistaken payment. After a paid reversal, compare Cashier Summary, Payments, and Cancelled Bills so the original payment and its reversal can be explained during handover.
Add an emergency product or service
Product and service setup normally belongs to the Storekeeper. Use this only for an urgent sale when the Storekeeper is unavailable, such as an approved special service required at night.
- First search Products to make sure the item does not already exist.
- Select New Product.
- Enter the approved name, group, cost, selling price, category, availability, and tax.
- For a special service, choose Service as the product type.
- Do not enable inventory tracking for a service.
- Review the name, selling price, and tax with the person who approved the request, then submit once.
- Confirm the new entry appears in Products and is available where required.
- Record what was added and ask the Storekeeper to review it at the next opportunity.
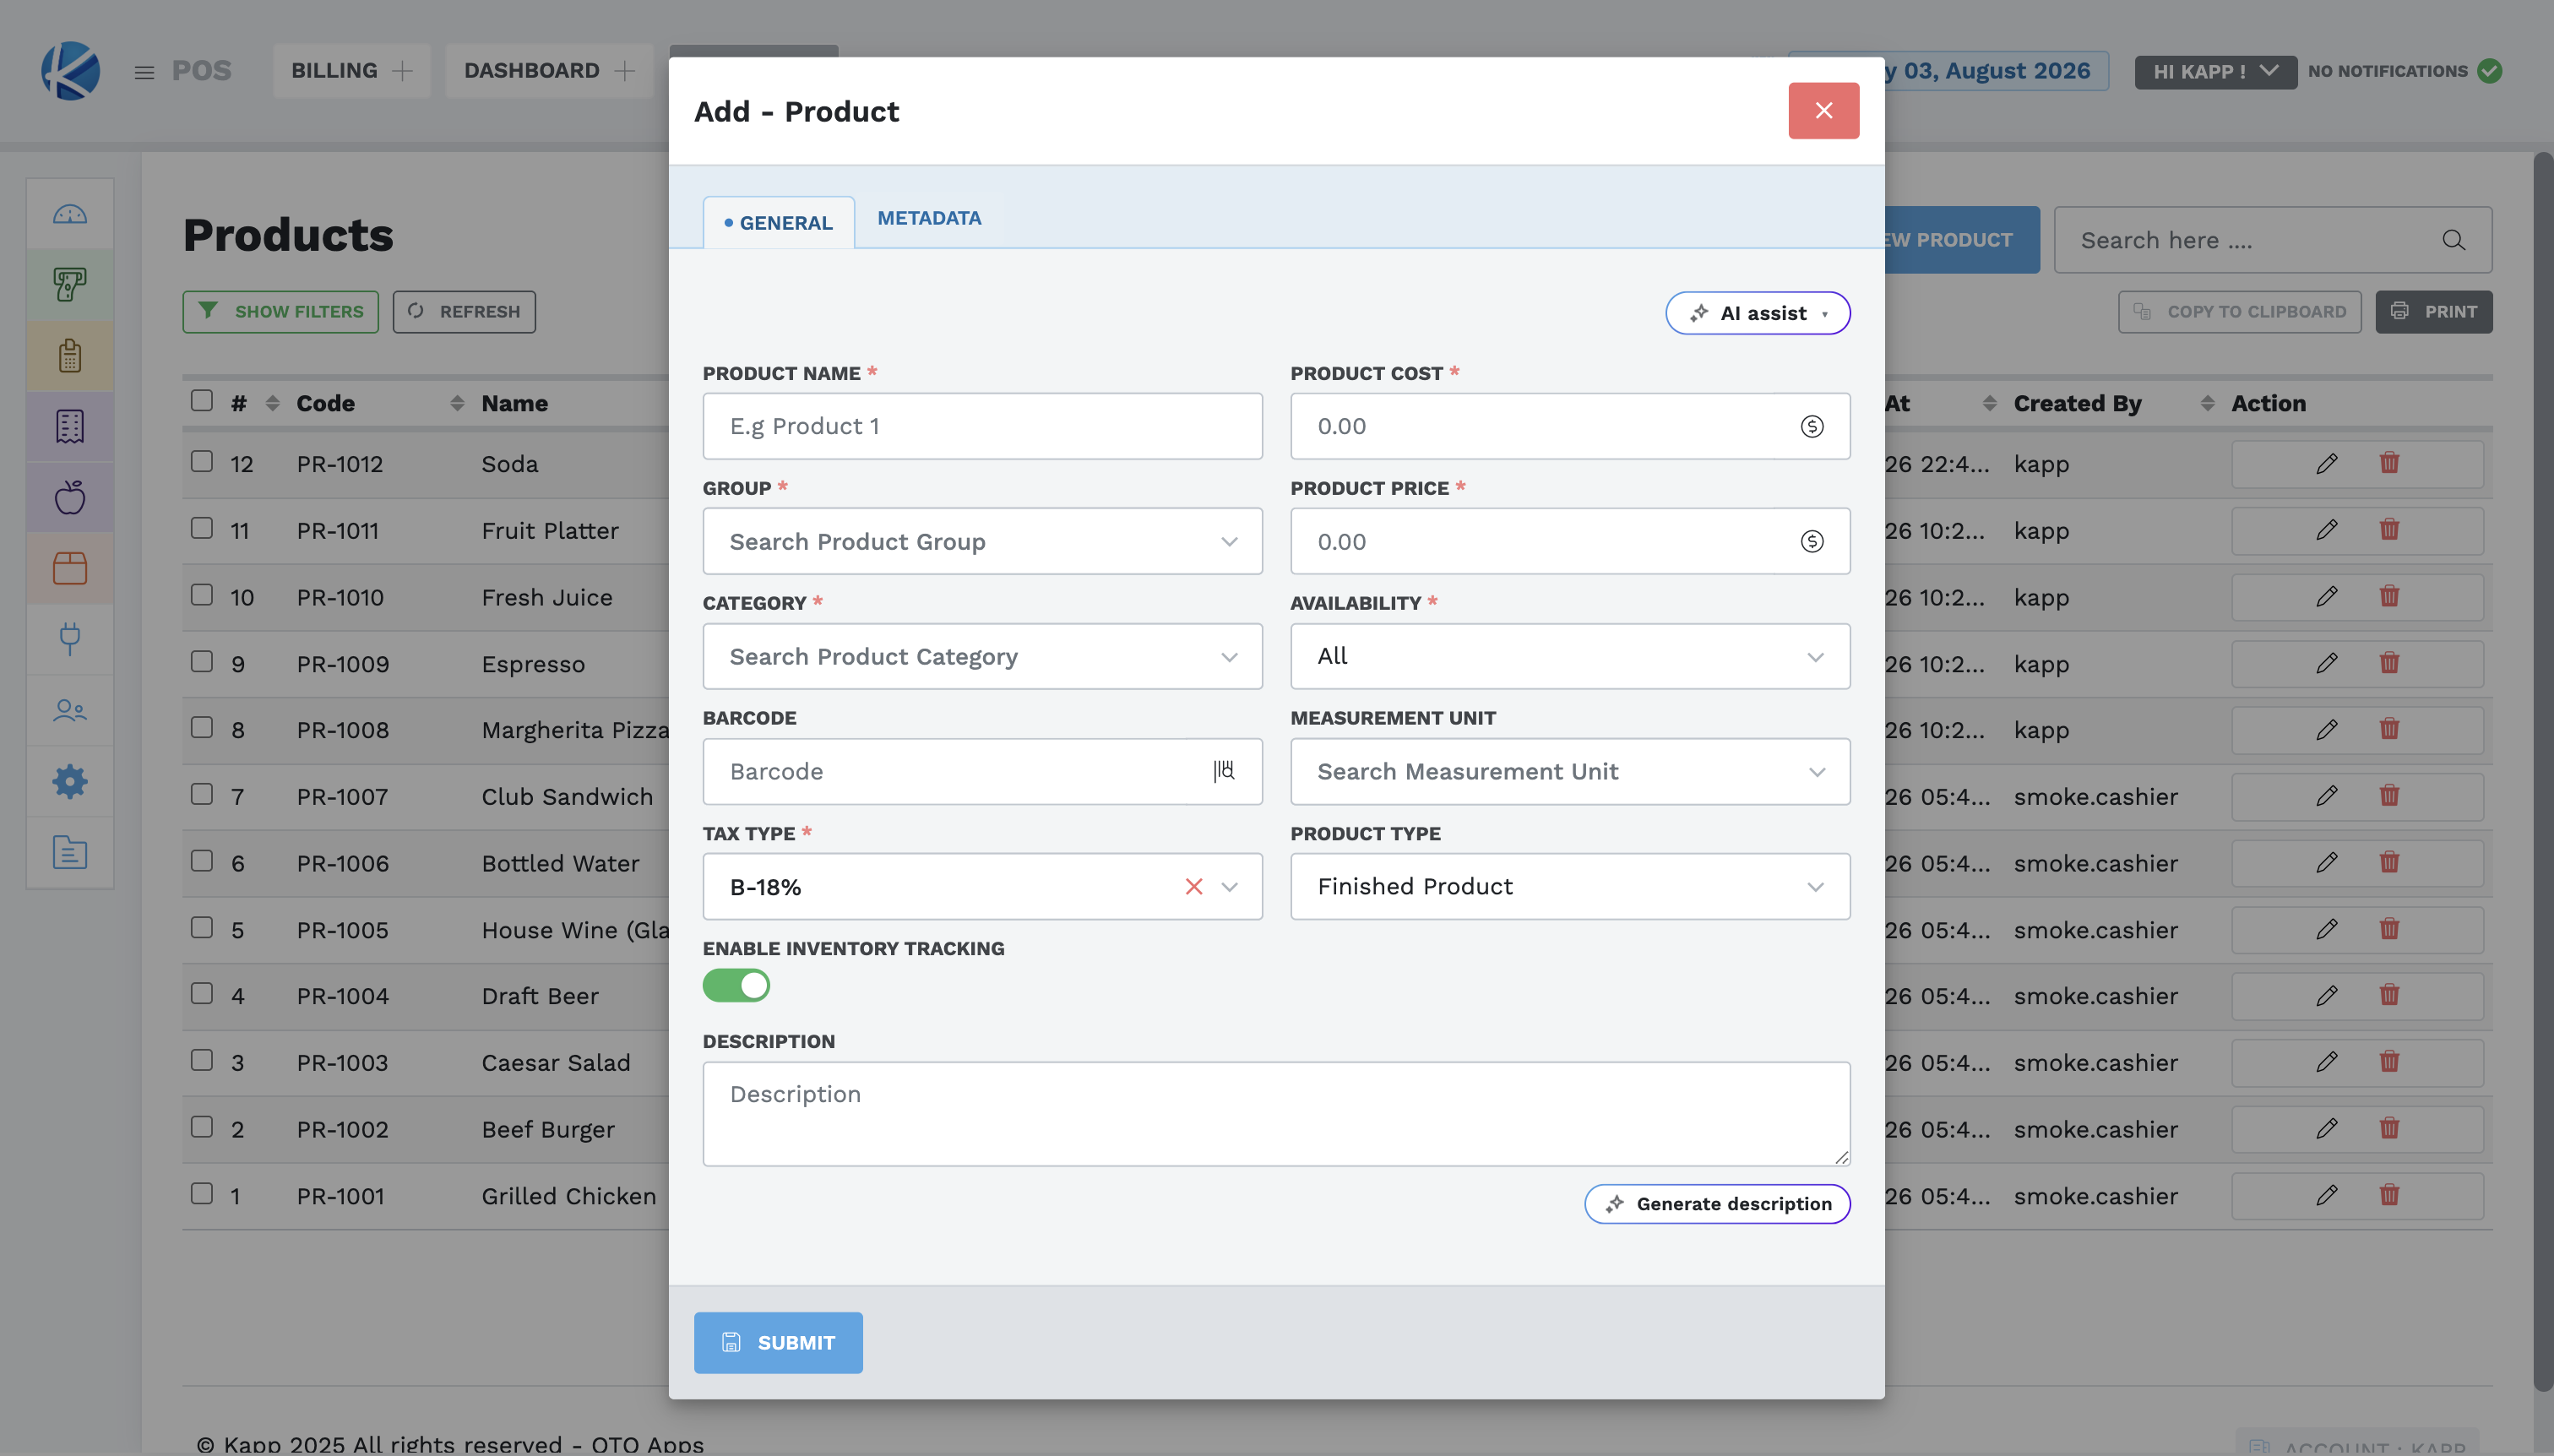
Do not guess a price, tax, category, or stock setting. If any required detail is unclear, do not create the entry.
Approve an additional print copy
Before printing another copy, confirm the order or bill ID, its status, the number of copies already printed, and the reason for the request.
- A kitchen order has one normal print. Another copy requires Supervisor level or above.
- A bill normally allows up to two printouts across its stages, such as one before final payment and one final receipt. Further copies require Supervisor level or above.
- Print only from the saved order or bill. Never recreate a transaction to make another receipt.
- Confirm the physical output and updated copy count. If printing fails, record the message and use the approved fallback.
Add a waiter or cashier
The person must already have an approved user account.
- Open Waiters or Cashiers.
- Search the list first to avoid adding the person twice.
- Select New Waiter or New Cashier.
- Choose the correct approved user.
- Verify the person's name and username, then save once.
- Confirm the person appears in the list and is active.
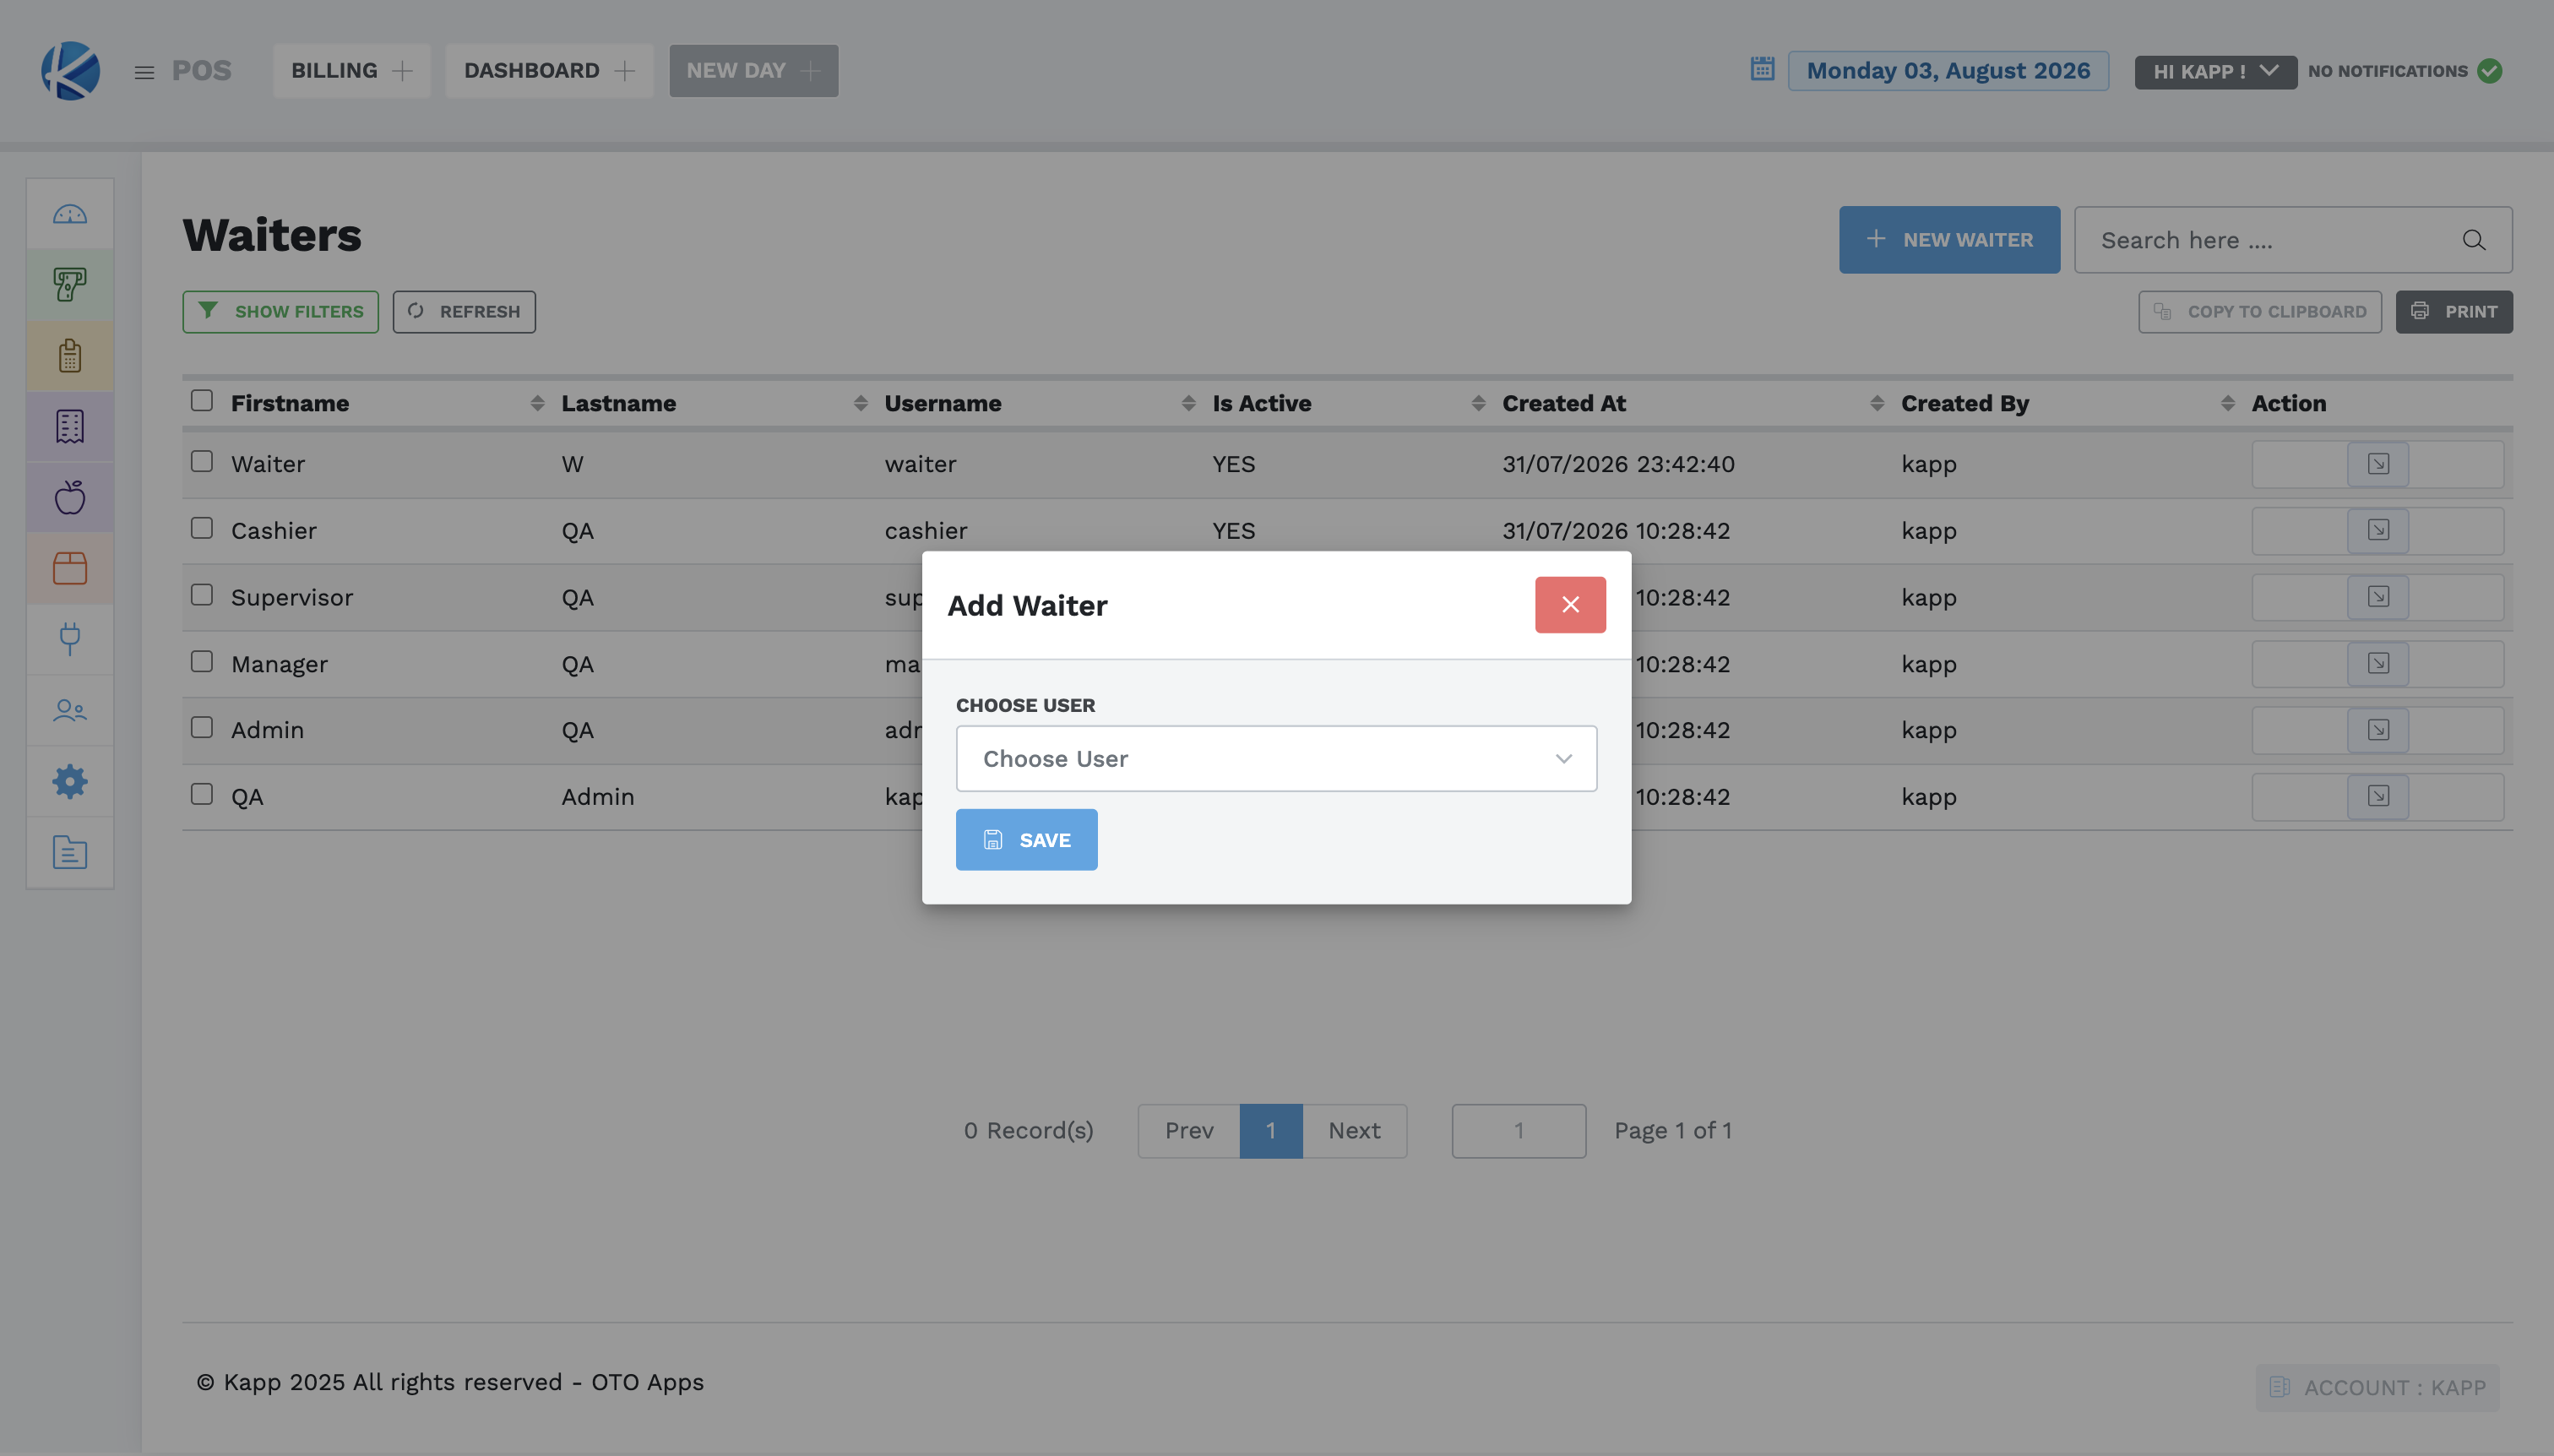
Use the activation or deactivation action when access should be paused or restored. Never choose a similarly named user without checking the username.
Table changes
A Supervisor may see New Table, Edit, and Delete, but cannot save those changes with the validated permissions. Record the required table name, alias, and description and ask a Manager or Administrator to make the change.
Do not keep retrying when access is refused.
Read the dashboard
Dashboard is the at-a-glance view of the trading day. It shows the current workstation, a summary of the day, a sales summary, the day's and the week's sales, peak hours, the most popular products, and the waiters with the most orders.
Use it to spot something worth checking — a quiet hour, a product that has stopped selling, a waiter with no orders. Use a report, not the dashboard, when you need a figure to reconcile or to hand to someone else.
Use POS reports
Choose the required report, set the correct date or date range, and select Generate. Confirm the heading and dates before using, printing, or sharing the result.
| Need | Report |
|---|---|
| Review bills, payments, paid amounts, and balances | Sales |
| Review sales for one day | Daily Report |
| Review quantities, sales, costs, and profit by item | Product Sales |
| Review orders by waiter, table, and store | Orders |
| Review credit, complimentary, discounted, cancelled, or room bills | Matching bill report |
| Reconcile a cashier by payment method | Cashier Summary |
| Trace individual payment entries | Payments |
| Review the current trading period | X Report |
| Review the closed period for a selected date | Z Report |
An empty report may simply mean there were no matching transactions. Recheck the dates and report type before reporting that information is missing.
Supervisor handover
Before handing over:
- Review pending bills and unresolved requests.
- Record every cancelled order and bill with its ID and reason.
- Reconcile paid reversals using Cashier Summary, Payments, and Cancelled Bills.
- List any urgent product or service added for Storekeeper review.
- List access changes made for waiters or cashiers.
- Escalate unresolved table changes to a Manager or Administrator.
Close the trading day
Only perform this under the approved closing procedure. New Day changes the working date and must not be used as a preview. It cannot proceed while there are pending bills or pending orders.
- Review Pending Bills and resolve every pending bill. Review open orders and resolve every pending order. Check both lists again before continuing.
- Generate Cashier Summary and Payments. Reconcile each payment method with the physical or external tender records.
- Generate X Report and compare it with those reports. If the totals do not agree, stop and record the discrepancy.
- Confirm that the closing role has approved proceeding.
- Select New Day, check the current date, enter a useful closing note, and confirm once.
- Verify that the date at the top of OTO advances to the next day.
- Open Z Report, select the closed date, and generate it for handover.
In the training check, X and Z showed the discount and zero pending bills but did not show the payment total found in Cashier Summary. This is why all three reports must be compared before closing.